Design Pattern
State Management
Vue components are the building blocks of Vue apps by allowing us to couple markup (HTML), logic (JS), and styles (CSS) within them.
Here’s an example of a Single-File component that displays a series of numbers from a data property:
<template>
  <div>
    <h2>The numbers are {{ numbers }}!</h2>
  </div>
</template>

<script setup>
  import { ref } from "vue";

  const numbers = ref([1, 2, 3]);
</script>
The ref() function prepares the component to be reactive. If a reactive property value that’s being used in the template changes, the
component view will re-render to show the change.
In the example above, numbers is the reactive data value used in the component. What if numbers was a data value that needed to be
accessed from another component? For example, we may need a component to be responsible for displaying numbers (like above) and another
to manipulate the value of numbers.
If we want to share numbers between multiple components, numbers doesn’t only become component-level data but also application-level data.
This brings us to the topic of State Management - the management of application level data.
Before we address how we can manage state in an application, we’ll begin by looking at how props can share data between parent and child components.
Props
Assume we have a hypothetical application, that at first only contains a parent component and a child component. Vue gives us the ability to use props to pass data from the parent down to the child.
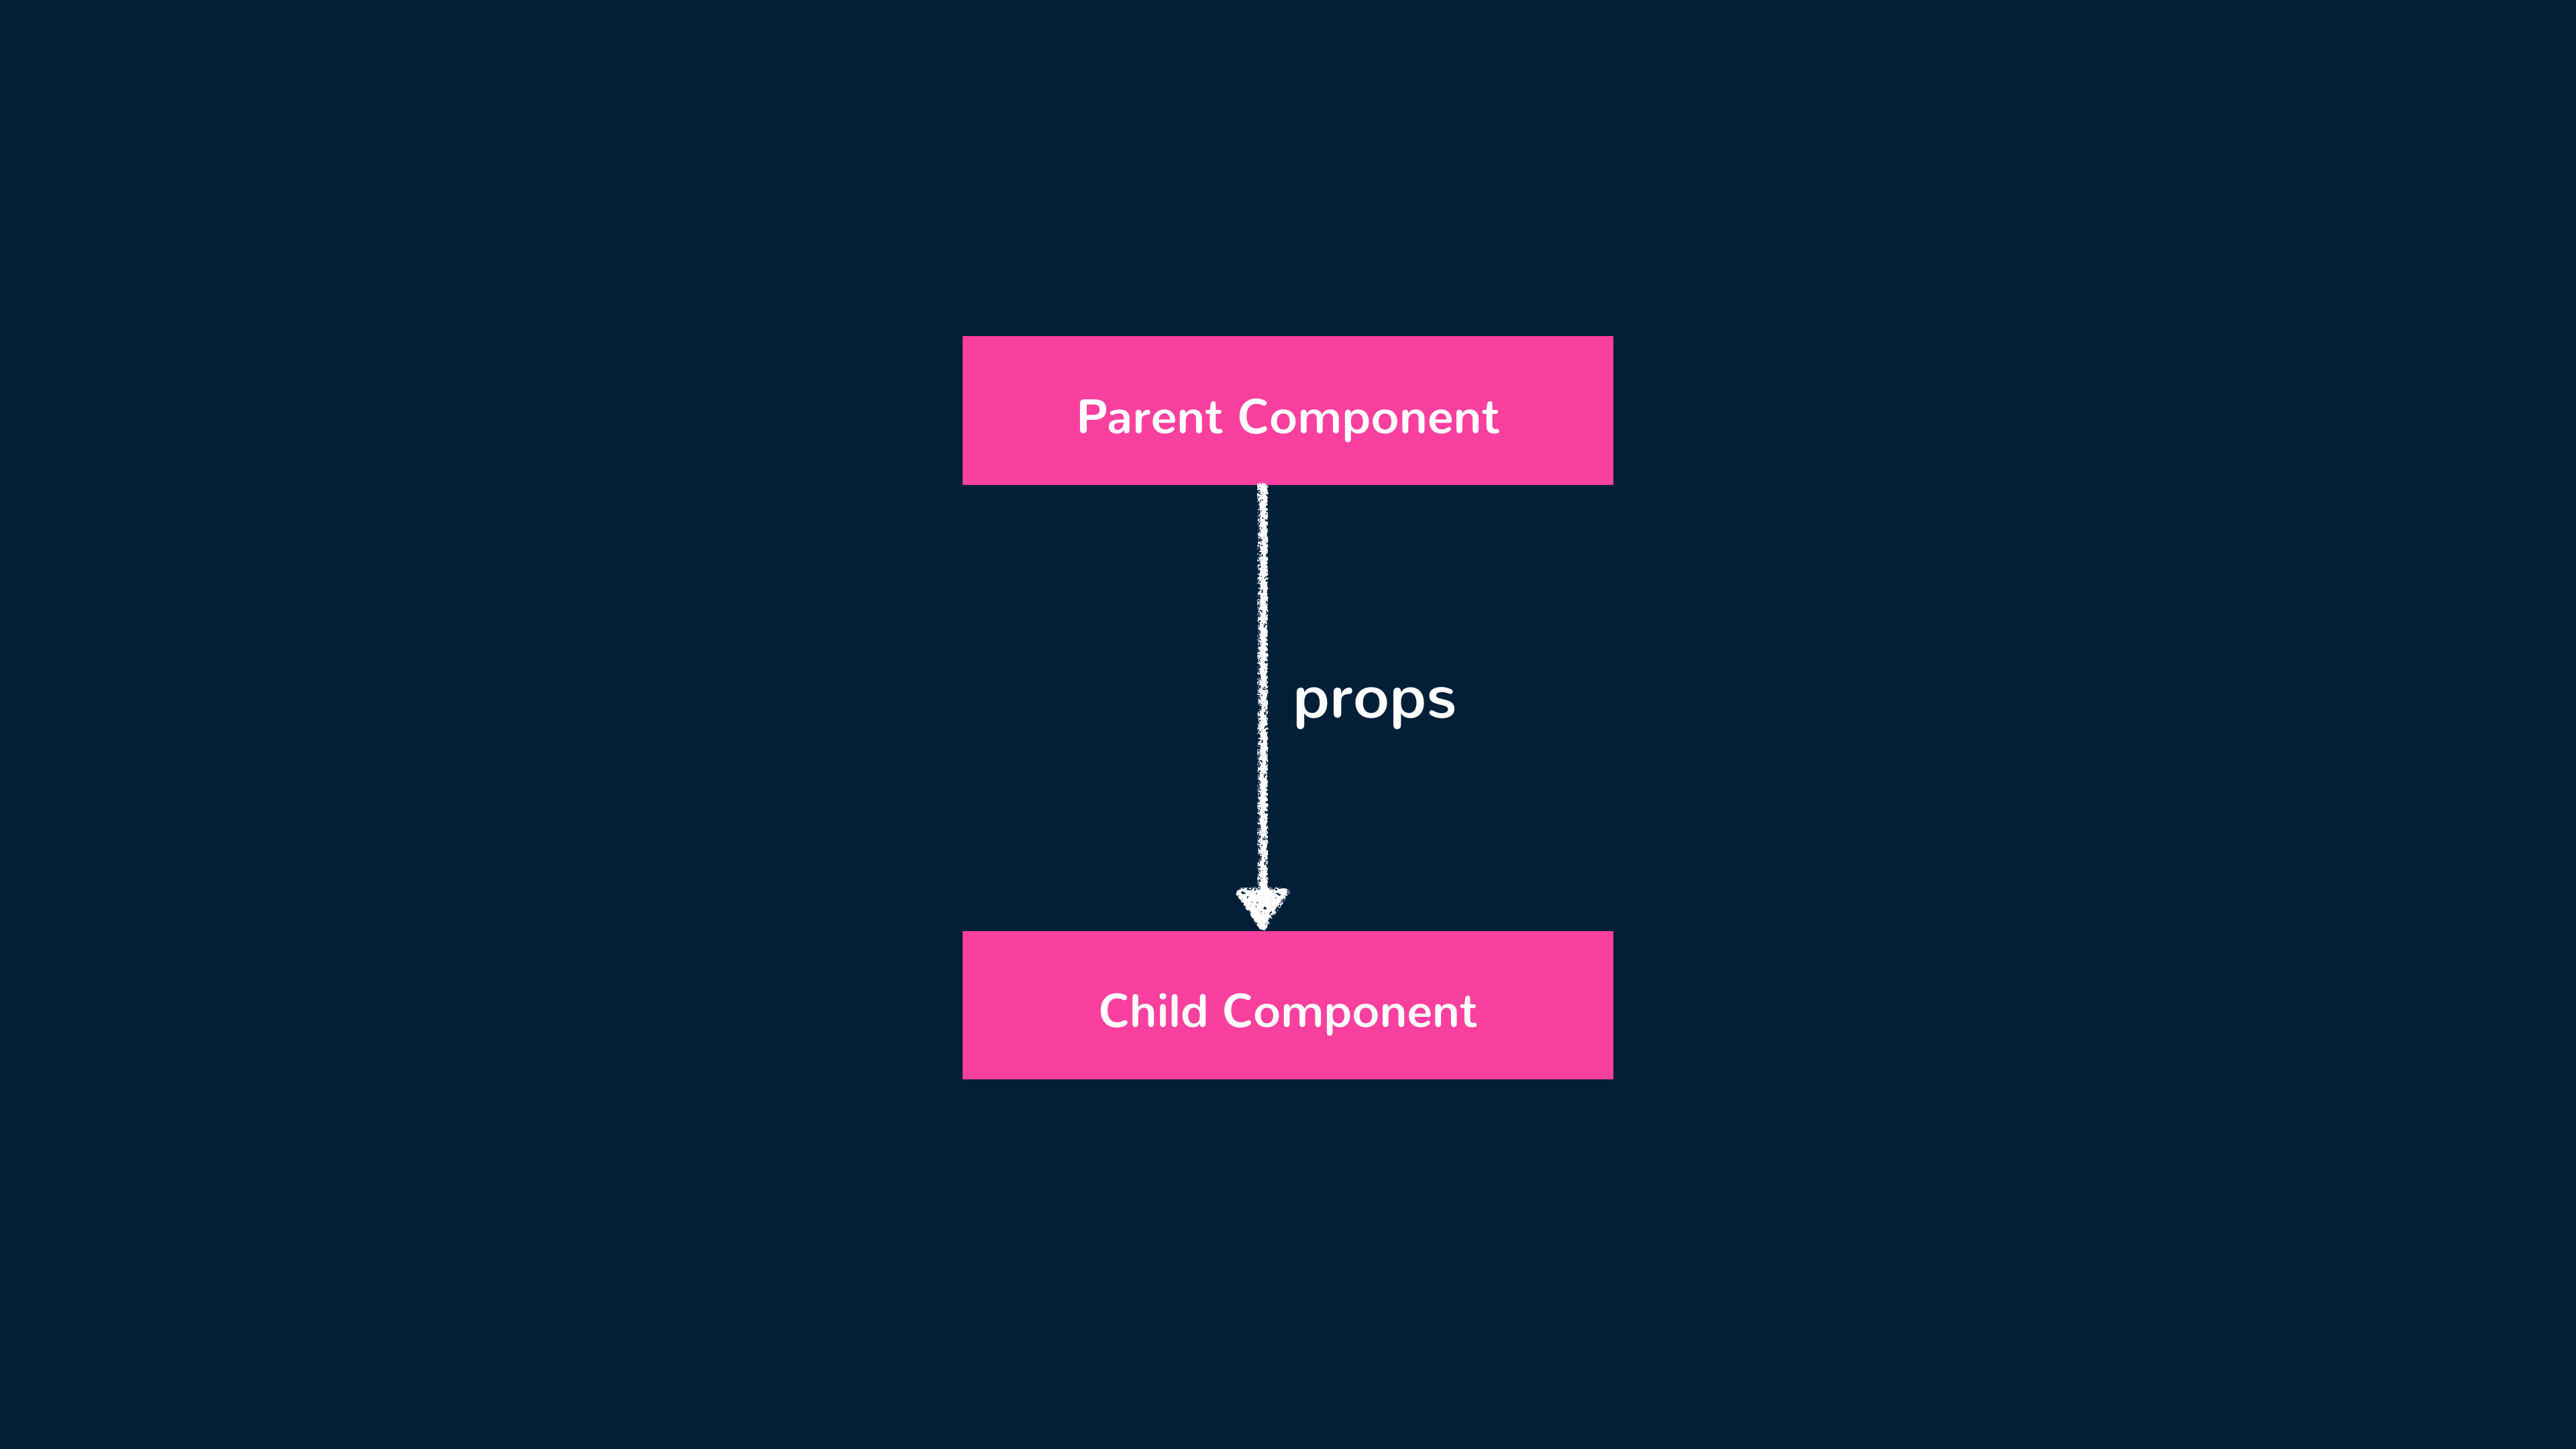
Using props is fairly simple. All we essentially need to do is bind a value to the prop attribute where the child component is being rendered. Here’s an example of using props to pass an array of values down with the help of the v-bind directive:
ParentComponent
<template>
  <div>
    <ChildComponent :numbers="numbers" />
  </div>
</template>

<script setup>
  import { ref } from "vue";
  import ChildComponent from "./ChildComponent";

  const numbers = ref([1, 2, 3]);
</script>
ChildComponent
<template>
  <div>
    <h2>{{ numbers }}</h2>
  </div>
</template>

<script setup>
  const { buttonText } = defineProps(["numbers"]);
</script>
The ParentComponent passes the numbers array as props of the same name down to ChildComponent. ChildComponent simply binds the value of
numbers onto its template.
1<template>2 <div>3 <ChildComponent :numbers="numbers" />4 </div>5</template>67<script setup>8 import { ref } from "vue";9 import ChildComponent from "./ChildComponent";1011 const numbers = ref([1, 2, 3]);12</script>
Component Events
What if we needed to find a way to communicate information in the opposite direction? An example of this could be allowing the user to introduce a new number to the array presented in the example above from the child component.
We can’t use props since props can only be used to pass data in a uni-directional format (from parent down to child down to grandchild…).
To facilitate having the child component notify the parent about something, we can use custom events.
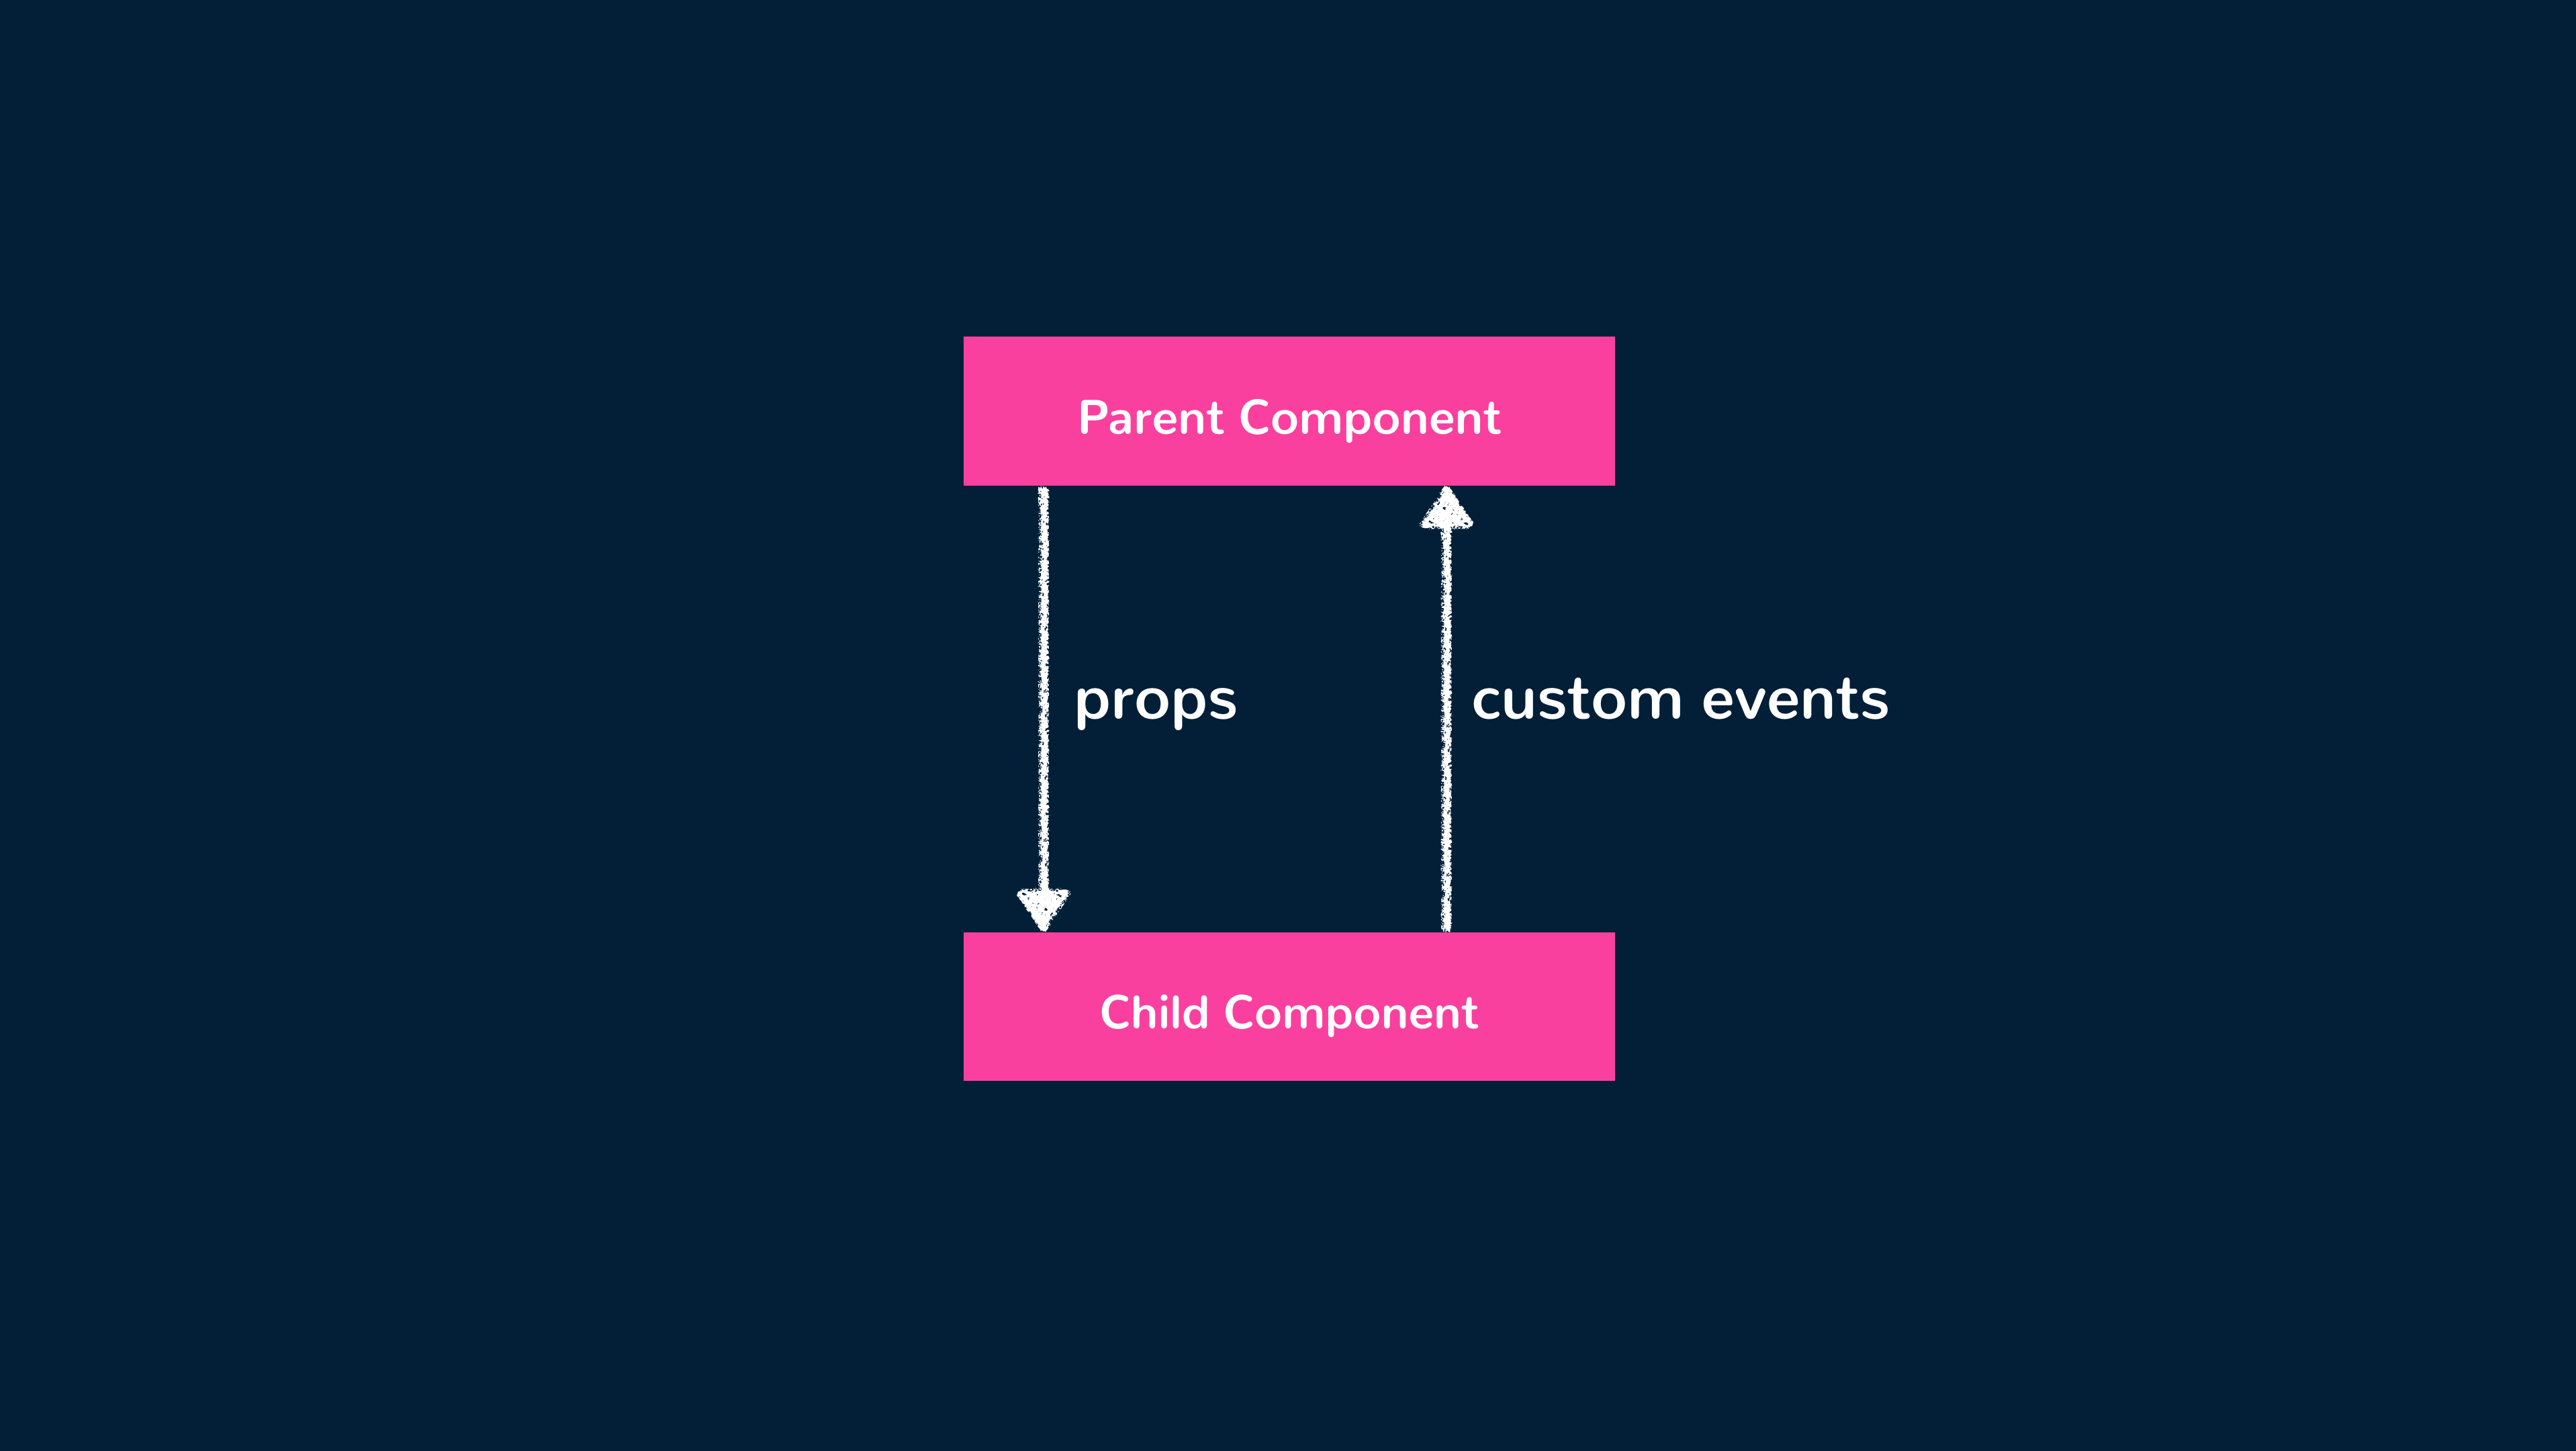
Custom events in Vue are dispatched as native CustomEvents and are used for communication between components.
Here’s an example of using custom events to have a ChildComponent be able to facilitate a change to a ParentComponent’s numbers data property:
ChildComponent
<template>
  <div>
    <h2>{{ numbers }}</h2>
    <input v-model="number" type="number" />
    <button @click="$emit('number-added', Number(number))">
      Add new number
    </button>
  </div>
</template>

<script setup>
  const { numbers } = defineProps(["numbers"]);
</script>
ParentComponent
<template>
  <div>
    <ChildComponent :numbers="numbers" @number-added="(n) => numbers.push(n)" />
  </div>
</template>

<script setup>
  import { ref } from "vue";
  import ChildComponent from "./ChildComponent";

  const numbers = ref([1, 2, 3]);
</script>
The ChildComponent has an input that captures a number value and a button that emits a number-added custom event with the captured
number value.
On the ParentComponent, a custom event listener denoted by @number-added, is specified where the child component is being rendered.
When this event is emitted in the child, it pushes the number value from the event to ParentComponent’s numbers array.
1<template>2 <div>3 <ChildComponent :numbers="numbers" @number-added="(n) => numbers.push(n)" />4 </div>5</template>67<script setup>8import { ref } from "vue";910// eslint-disable-next-line no-unused-vars11import ChildComponent from "./ChildComponent";1213// eslint-disable-next-line no-unused-vars14const numbers = ref([1, 2, 3]);15</script>
Simple State Management
We can use props to pass data downwards and custom events to send messages upwards. How would we be able to either pass data or facilitate communication between two different sibling components?
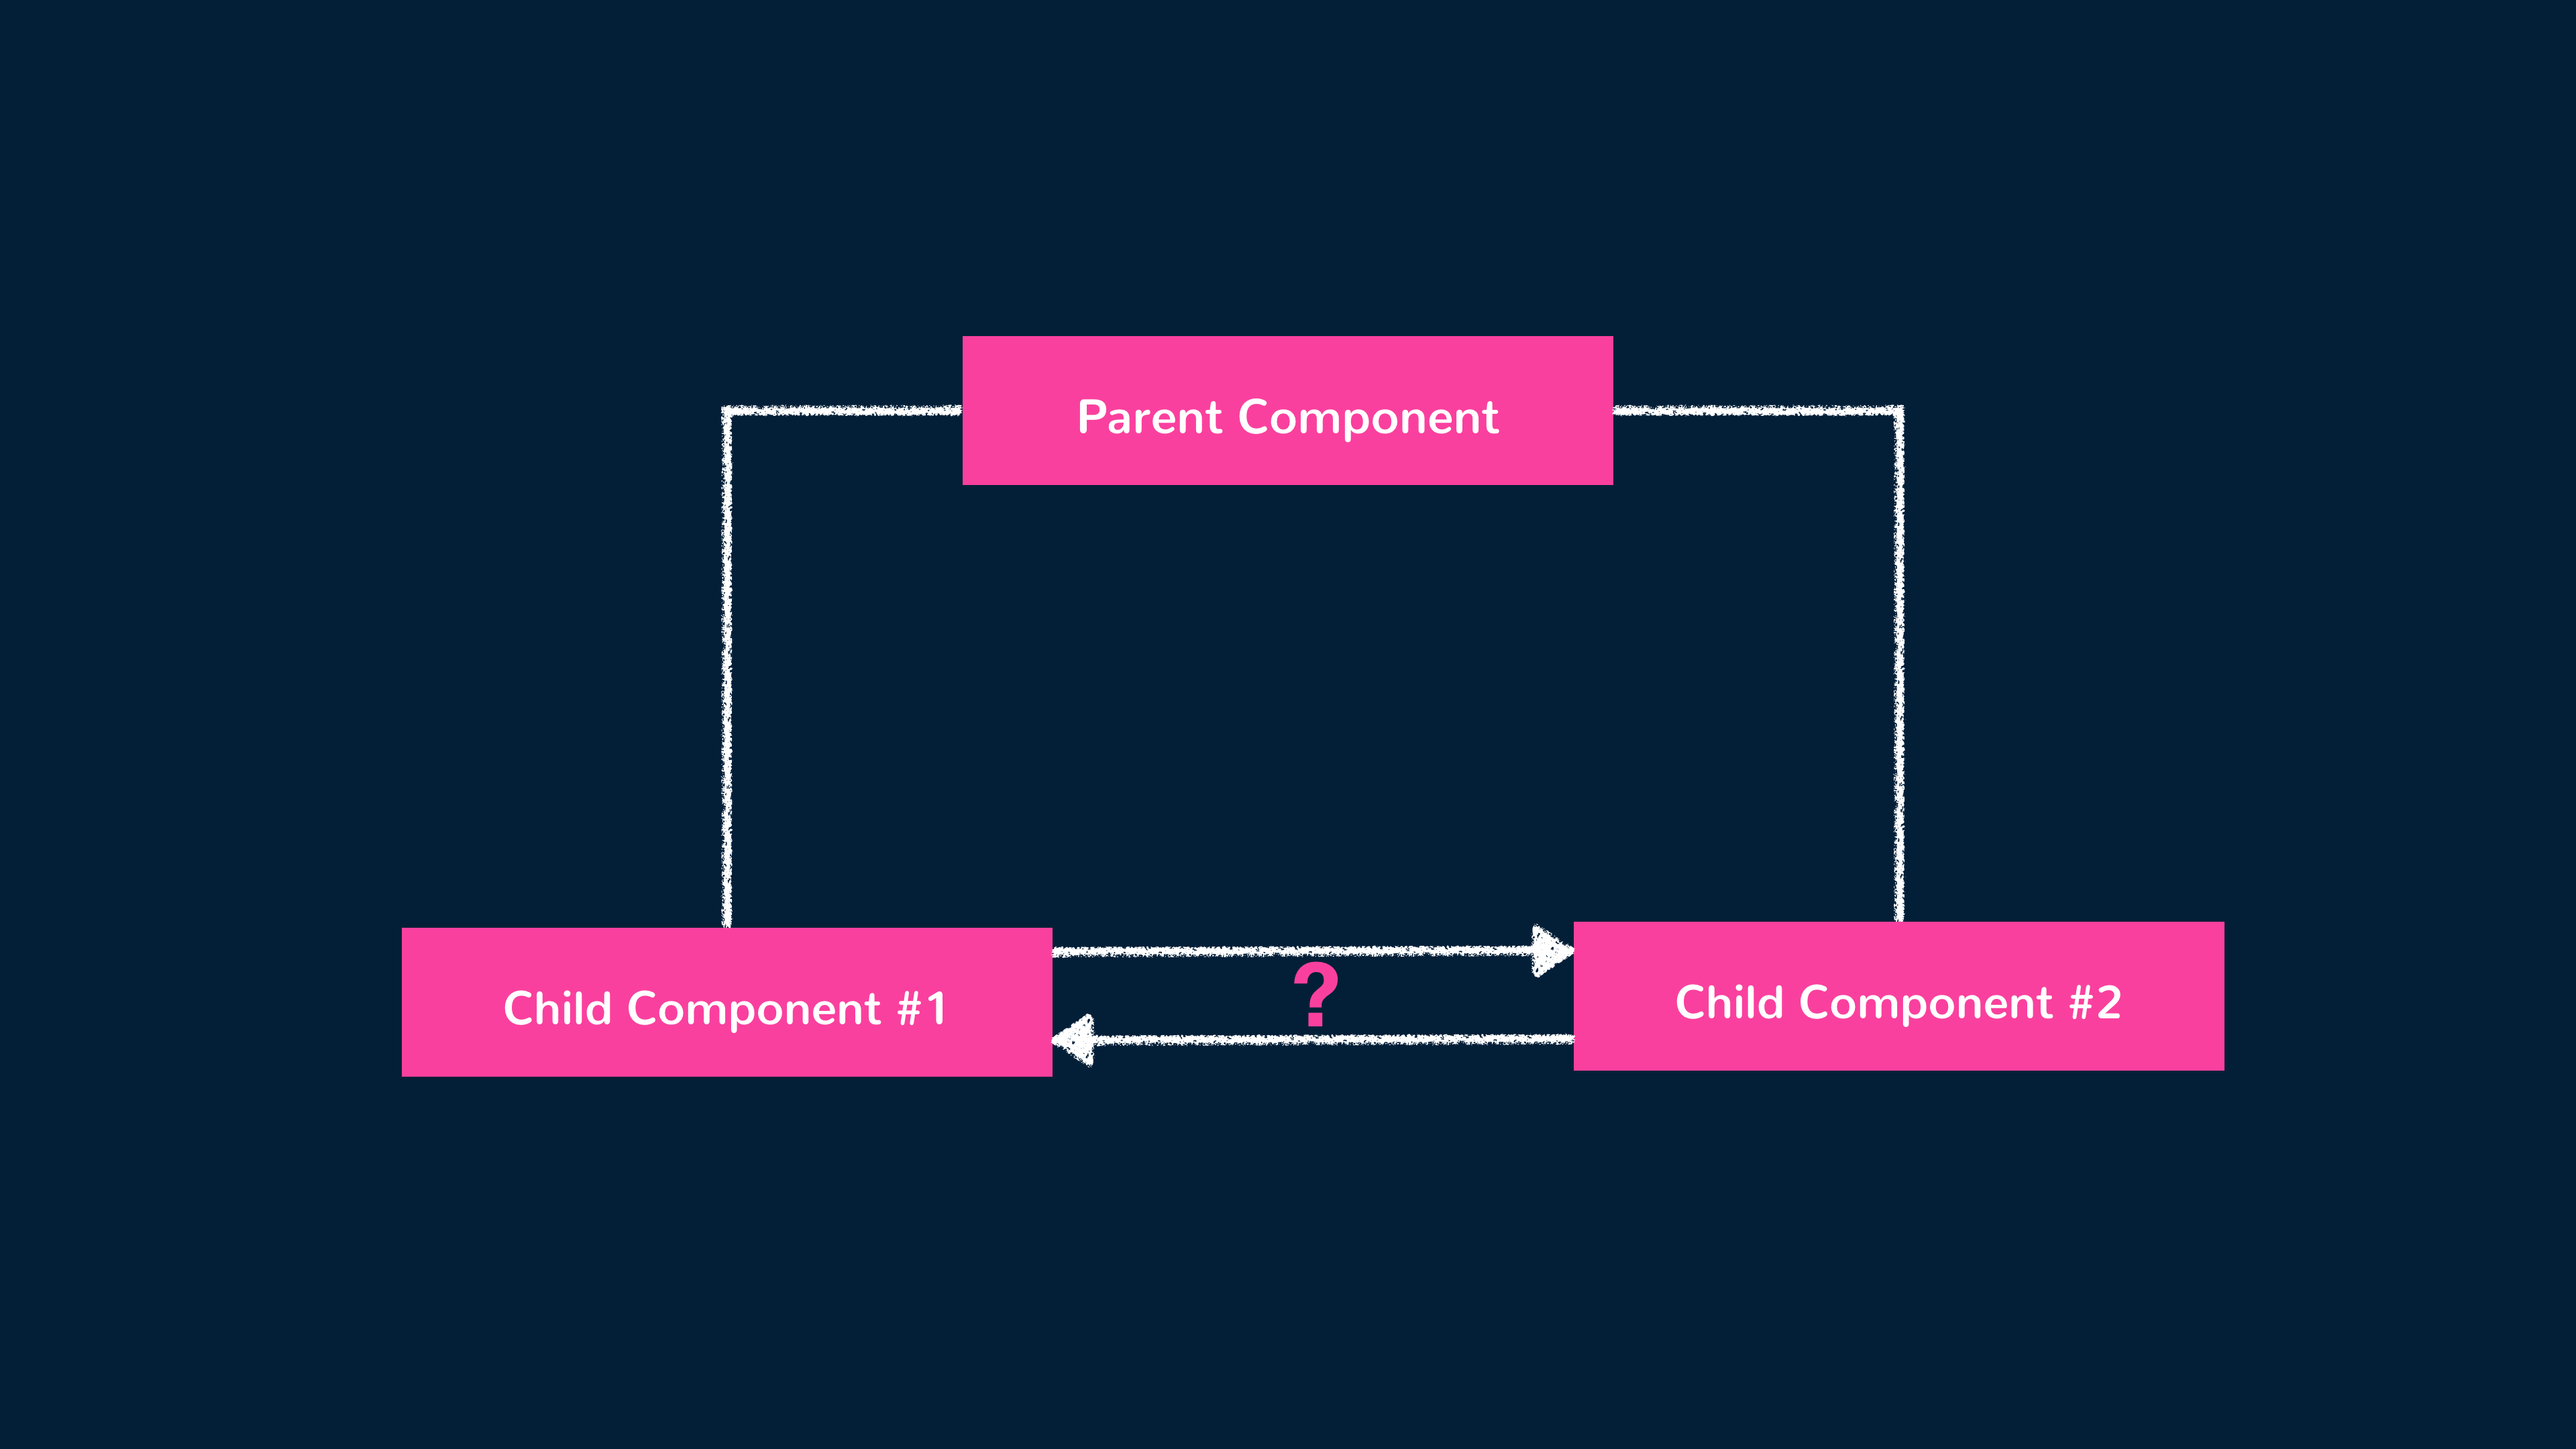
We can’t use custom events the way we have above because those events are emitted within the interface of a particular component, and as a result the custom event listener needs to be declared on where the component is being rendered. In two isolated components, one component isn’t being rendered within the other.
A simple way to manage application-level state is to create a store pattern that involves sharing a data store between components. The store can manage the state of our application as well as the methods that are responsible for changing the state.
For example, we can have a simple store like the following:
import { reactive } from "vue";

export const store = reactive({
  numbers: [1, 2, 3],
  addNumber(newNumber) {
    this.numbers.push(newNumber);
  },
});
The store contains a numbers array and an addNumber method that accepts a payload and directly updates the store’s numbers value.
Notice the use of a reactive() function to define the state object? With Vue 3.x, we’re able to import and use the reactive() function to
declare reactive state from a JavaScript object. When this reactive state gets changed with the addNumber() method, any component that uses
this reactive state will automatically update!
We can have one component that’s responsible for displaying the numbers array from the store that we’ll call NumberDisplay:
NumberDisplay:
<template>
  <div>
    <h2>{{ store.numbers }}</h2>
  </div>
</template>

<script setup>
  import { store } from "../store.js";
</script>
We can now have another component, called NumberSubmit, that will allow the user to add a new number to our data array:
NumberSubmit:
<template>
  <div>
    <input v-model="numberInput" type="number" />
    <button @click="store.addNumber(numberInput)">Add new number</button>
  </div>
</template>

<script setup>
  import { ref } from "vue";
  import { store } from "../store.js";

  const numberInput = ref(0);
</script>
The NumberSubmit component has an addNumber() method that calls the store.addNumber() mutation and passes the expected payload.
The store method receives the payload and directly mutates the store.numbers array. Thanks to Vue’s reactivity, whenever the numbers array
in store state gets changed, the relevant DOM that depends on this value (<template> of NumberDisplay) automatically updates.
1import { reactive } from "vue";23 export const store = reactive({4 numbers: [1, 2, 3],5 addNumber(newNumber) {6 this.numbers.push(newNumber);7 },8 });
When we say components interact with one another here, we’re using the term ‘interact’ loosely. The components aren’t going to do anything to each other but instead invoke changes to one another through the store.
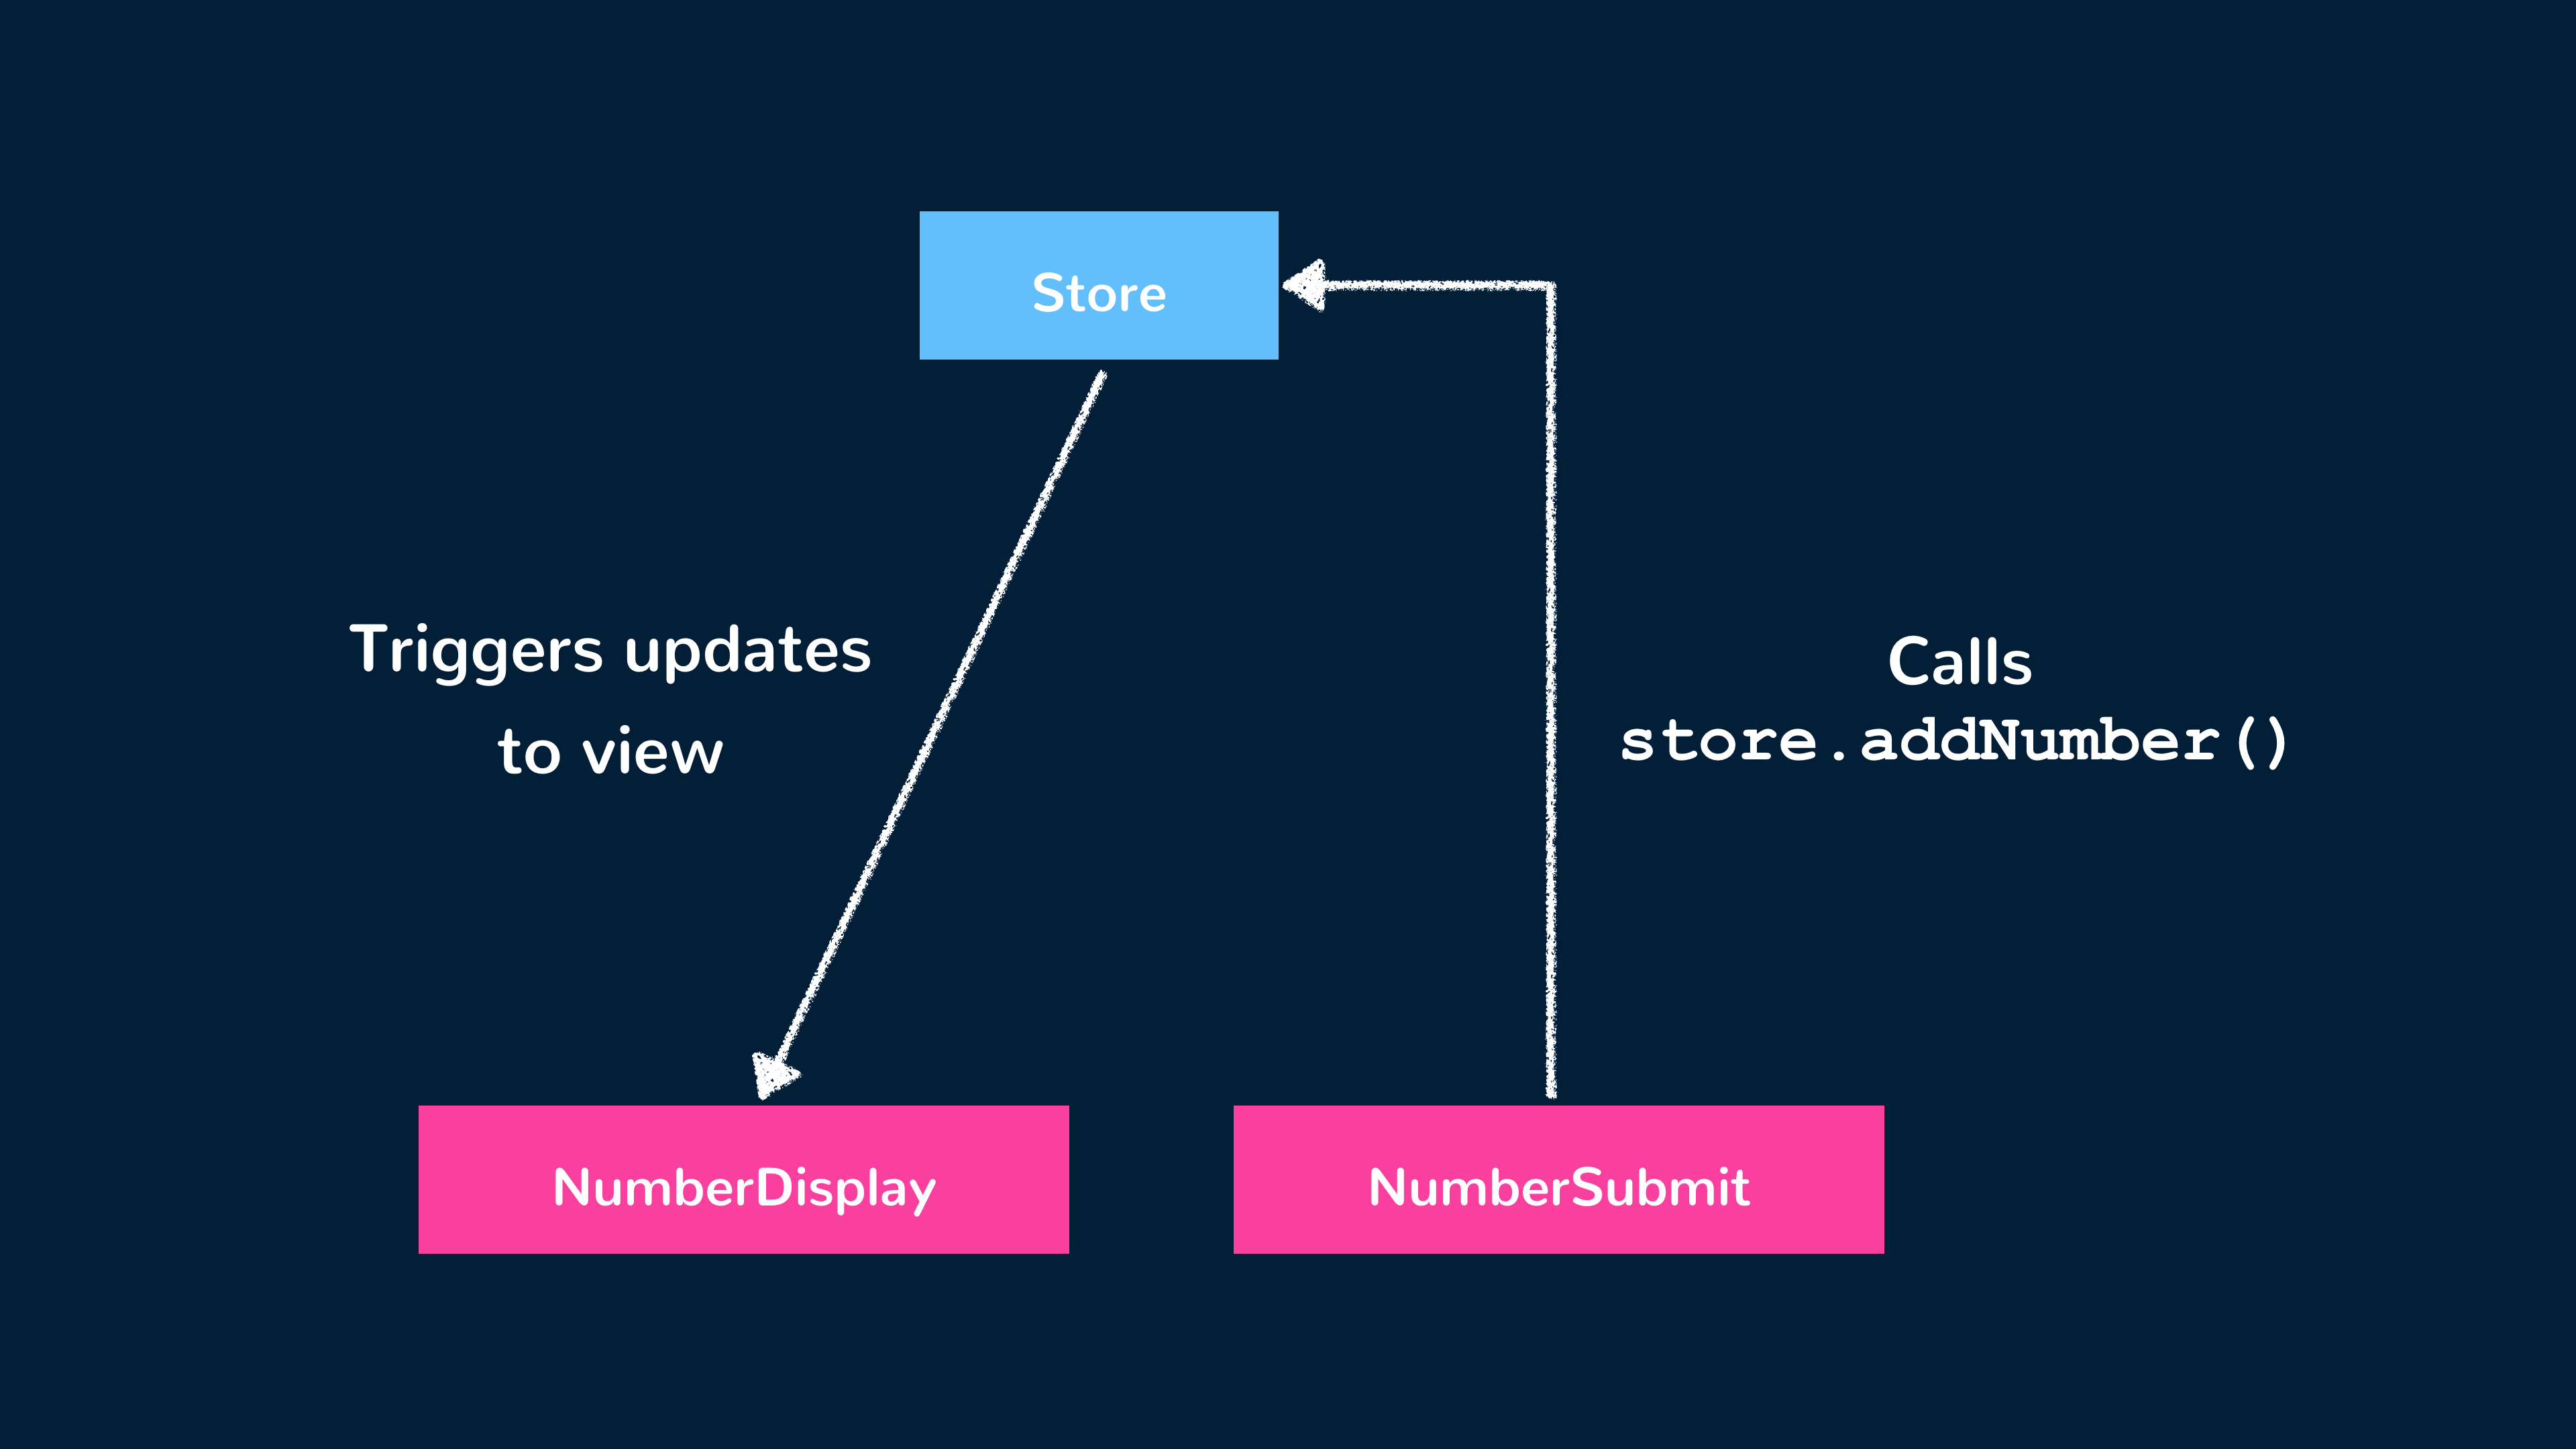
If we take a closer look at all the pieces that directly interact with the store, we can establish a pattern:
- The method in
NumberSubmithas the responsibility to directly act on the store method, so we can label it as a store action. - The store method has a certain responsibility as well - to directly mutate the store state. So we’ll say it’s a store mutation.
NumberDisplaydoesn’t really care about what type of methods exist in the store or inNumberSubmit, and is only concerned with getting information from the store. So we’ll sayNumberDisplayis a store getter of sorts.
An action commits to a mutation. The mutation mutates state which then affects the view/components. View/components retrieve store data with getters. We’re starting to get closer to a more structured manner to handling application-level state.
Pinia
Pinia is a state management pattern and library for Vue.js that provides a more structured and scalable way to handle application-level state.
Pinia is an alternative to other state management solutions like Vuex and is now the official state management library for Vue. It provides a simple and efficient way to create and manage stores, which encapsulate state, actions, and getters.
In Pinia, we can define a store using the defineStore() function. Pinia allows us to define a store with a syntax that mimics the Options API
or Composition API. Here we’re using the Composition API syntax to define a useNumbersStore() function to create a numbers store.
import { ref } from "vue";
import { defineStore } from "pinia";

export const useNumbersStore = defineStore("numbers", () => {
  const numbers = ref([1, 2, 3]);

  function addNumber(newNumber) {
    this.numbers.push(newNumber);
  }

  return { numbers, addNumber };
});
In the above example, we define a store called numbers with an initial state containing a numbers property. We also define one action,
addNumber(), that modifies the numbers state.
We can then create a Pinia instance and install it in our Vue app.
import { createApp } from "vue";
import { createPinia } from "pinia";
import App from "./App.vue";
import "./styles.css";

const app = createApp(App);
const pinia = createPinia();

app.use(pinia);
app.mount("#app");
At this moment, we’ll be able to use our newly created store in our components. In the NumberDisplay component, we’ll import the
useNumbersStore() function from the store file and invoke it to get access to the store instance. We can then reference the store numbers value
in the component template.
<template>
  <div>
    <h2>{{ store.numbers }}</h2>
  </div>
</template>

<script setup>
  import { useNumbersStore } from "../store";

  const store = useNumbersStore();
</script>
In the NumberSubmit component, we can do the same as the above to access the store addNumber() method that will be used to update the
store numbers property.
<template>
  <div>
    <input v-model="numberInput" type="number" />
    <button @click="store.addNumber(numberInput)">Add new number</button>
  </div>
</template>

<script setup>
  import { ref } from "vue";
  import { useNumbersStore } from "../store";

  const store = useNumbersStore();
  const numberInput = ref(0);
</script>
With these changes, our app will behave just as it did before.
1import { defineStore } from "pinia";2 import { ref } from "vue";34 export const useNumbersStore = defineStore("numbers", () => {5 const numbers = ref([1, 2, 3]);67 function addNumber(newNumber) {8 this.numbers.push(newNumber);9 }1011 return { numbers, addNumber };12 });
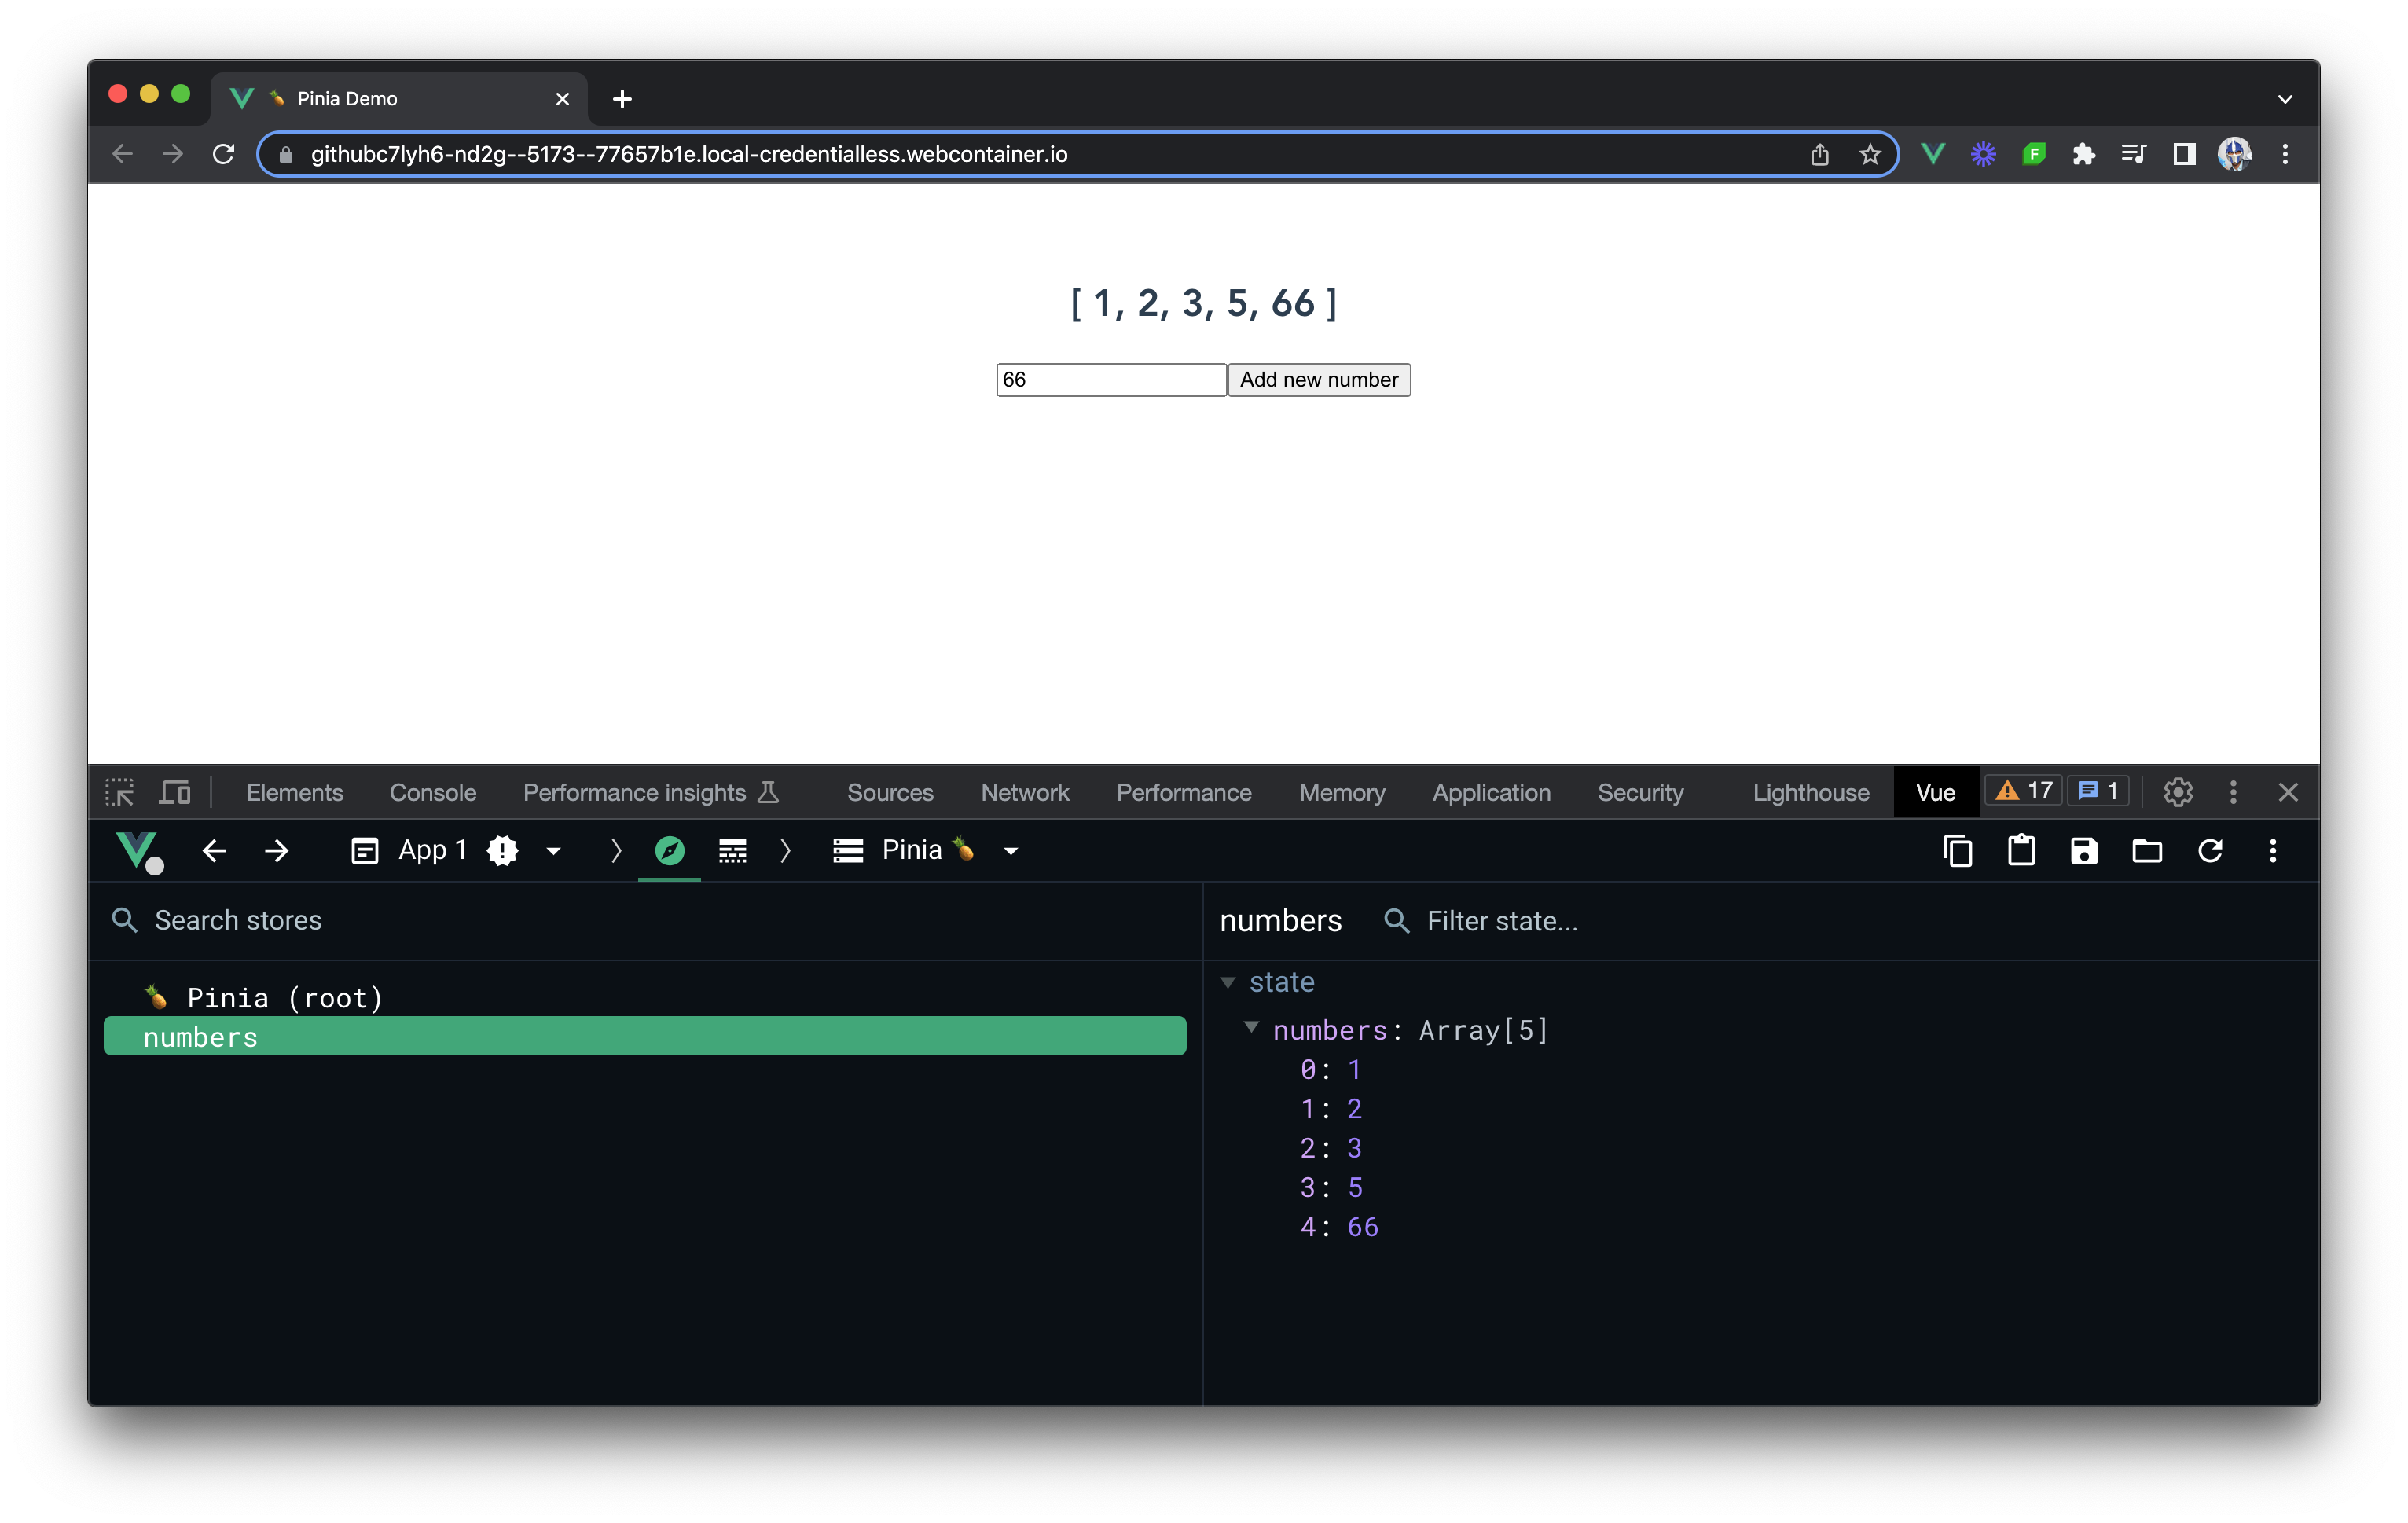
For such a simple implementation like this, a Pinia store may not really be necessary and behaves very similarly to just using a store created with
the reactive() function. With that said, Pinia offers additional capabilities for more complex use-cases such as the ability to
extend Pinia features with plugins, have devtools support, and have more appropriate TypeScript support
and server-side rendering support.
What’s the correct way?
Each method for managing application-level state comes with its advantages and disadvantages.
Simple Store
- Pro: Relatively easy to establish.
- Con: State and possible state changes aren’t explicitly defined.
Pinia
- Pro: Devtools support, plugins + typescript + server-side rendering support
- Con: Additional boilerplate.
At the end of the day, it’s up to us to understand what’s needed in our application and what the best approach may be.