Design Pattern
<script setup>
Before we delve into the <script setup> syntax and what it is, let’s quickly recap two concepts — single-file components
and the Composition API.
In Vue, SFCs help couple logic by giving us the ability to define HTML/CSS and JS of a component all within a single .vue file.
A single-file component consists of three parts:
<template>
  <!-- HTML template goes here -->
</template>

<script>
  // JavaScript logic goes here
</script>

<style>
  /* CSS styles go here */
</style>
<template> contains the component’s markup in plain HTML, <script> exports the component object constructor that
consists of all the JS logic within that component, and <style> contains all the component styles.
The Composition API provides standalone functions representing Vue’s core capabilities. These functions are primarily used
within a single setup() option which serves as the entry point for utilizing the Composition API.
<!-- Template -->

<script>
  export default {
    name: "MyComponent",
    setup() {
      // the setup function
    },
  };
</script>

<!-- Styles -->
Be sure to read the Composables guide for a deeper-dive into the advantages the Composition API provides over the traditional Options API syntax.
<script setup>
<script setup> is compile-time syntactic sugar that allows for a more concise and efficient syntax in defining Vue
options with the Composition API. According to the Vue documentation, it is the recommended syntax if one is using both SFCs
and the Composition API.
By utilizing the <script setup> block, we can condense our component logic into a single block, eliminating the need for
an explicit setup() function. To use the <script setup> syntax, we simply need to introduce the setup
attribute to the <script /> block.
<script setup>
  // ...
</script>
Let’s explore some of the main differences in syntax the <script setup> provides.
No return statement
With the <script setup> syntax, we no longer need to define a return statement at the end of our block. Bindings declared at
the top level (functions, variables, imports, etc.) are readily accessible and usable in the template.
Before
<template>
  <div>
    <p>Count: {{ count }}</p>
    <p>Username: {{ state.username }}</p>
    <button @click="increment">Increment Count</button>
  </div>
</template>

<script>
  import { ref, reactive, onMounted } from "vue";

  setup() {
    const count = ref(0);
    const state = reactive({username: "John"});

    const increment = () => {
      count.value++;
    };

    onMounted(() => {
      console.log("Component mounted");
    });

    return {
      count,
      state,
      increment
    };
  },
</script>
After
<template>
  <div>
    <p>Count: {{ count }}</p>
    <p>Username: {{ state.username }}</p>
    <button @click="increment">Increment Count</button>
  </div>
</template>

<script setup>
  import { ref, reactive, onMounted } from "vue";

  const count = ref(0);
  const state = reactive({ username: "John" });

  const increment = () => {
    count.value++;
  };

  onMounted(() => {
    console.log("Component mounted");
  });
</script>
No locally registered components
Component imports are automatically recognized and resolved within the <script setup> block without the need to explicitly
declare the component within a components option.
Before
<template>
  <ButtonComponent />
</template>

<script>
  import ButtonComponent from "./components/ButtonComponent.vue";

  export default {
    setup() {
      // the setup function
    },
    components: {
      ButtonComponent,
    },
  };
</script>
After
<template>
  <ButtonComponent />
</template>

<script setup>
  import { ButtonComponent } from "./components/Button";
</script>
defineProps()
Props can be accessed directly within the <script setup> block by using the defineProps() function.
Before
<template>
  <button>{{ buttonText }}</button>
</template>

<script>
  export default {
    props: {
      buttonText: String,
    },
  };
</script>
After
<template>
  <button>{{ buttonText }}</button>
</template>

<script setup>
  const { buttonText } = defineProps({
    buttonText: String,
  });
</script>
defineProps() also allow us to declare the shape of our props with pure TypeScript.
<template>
  <button>{{ buttonText }}</button>
</template>

<script setup lang="ts">
  const { buttonText } = defineProps<{ buttonText: string }>();
</script>
To provide default prop values in the type-only declaration we have above, we can use the withDefaults() compiler macro to
achieve this.
<template>
  <button>{{ buttonText }}</button>
</template>

<script setup lang="ts">
  const { buttonText } = withDefaults(defineProps<{ buttonText: string }>(), {
    buttonText: "Initial button text",
  });
</script>
defineProps is available only in <script setup> and can be used without having to be imported.
defineEmits()
Similar to props, custom events can be emitted directly within the <script setup> block by using the defineEmits() function in
a component.
Before
<template>
  <button @click="closeButton">Button Text</button>
</template>

<script>
  export default {
    emits: ["close"],
    setup(props, { emit }) {
      const closeButton = () => emit("close");

      return {
        closeButton,
      };
    },
  };
</script>
After
<template>
  <button @click="closeButton">Button Text</button>
</template>

<script setup>
  const emit = defineEmits(["close"]);
  const closeButton = () => emit("close");
</script>
Like defineProps, defineEmits is a special keyword available only in <script setup> and can also be used without
having to be imported. It also allows us to pass in types directly when working within a TypeScript setting.
<template>
  <button @click="closeButton">Button Text</button>
</template>

<script setup lang="ts">
  const emit = defineEmits<{ (e: "close"): void }>(["close"]);
  const closeButton = () => emit("close");
</script>
<script setup> vs. setup()
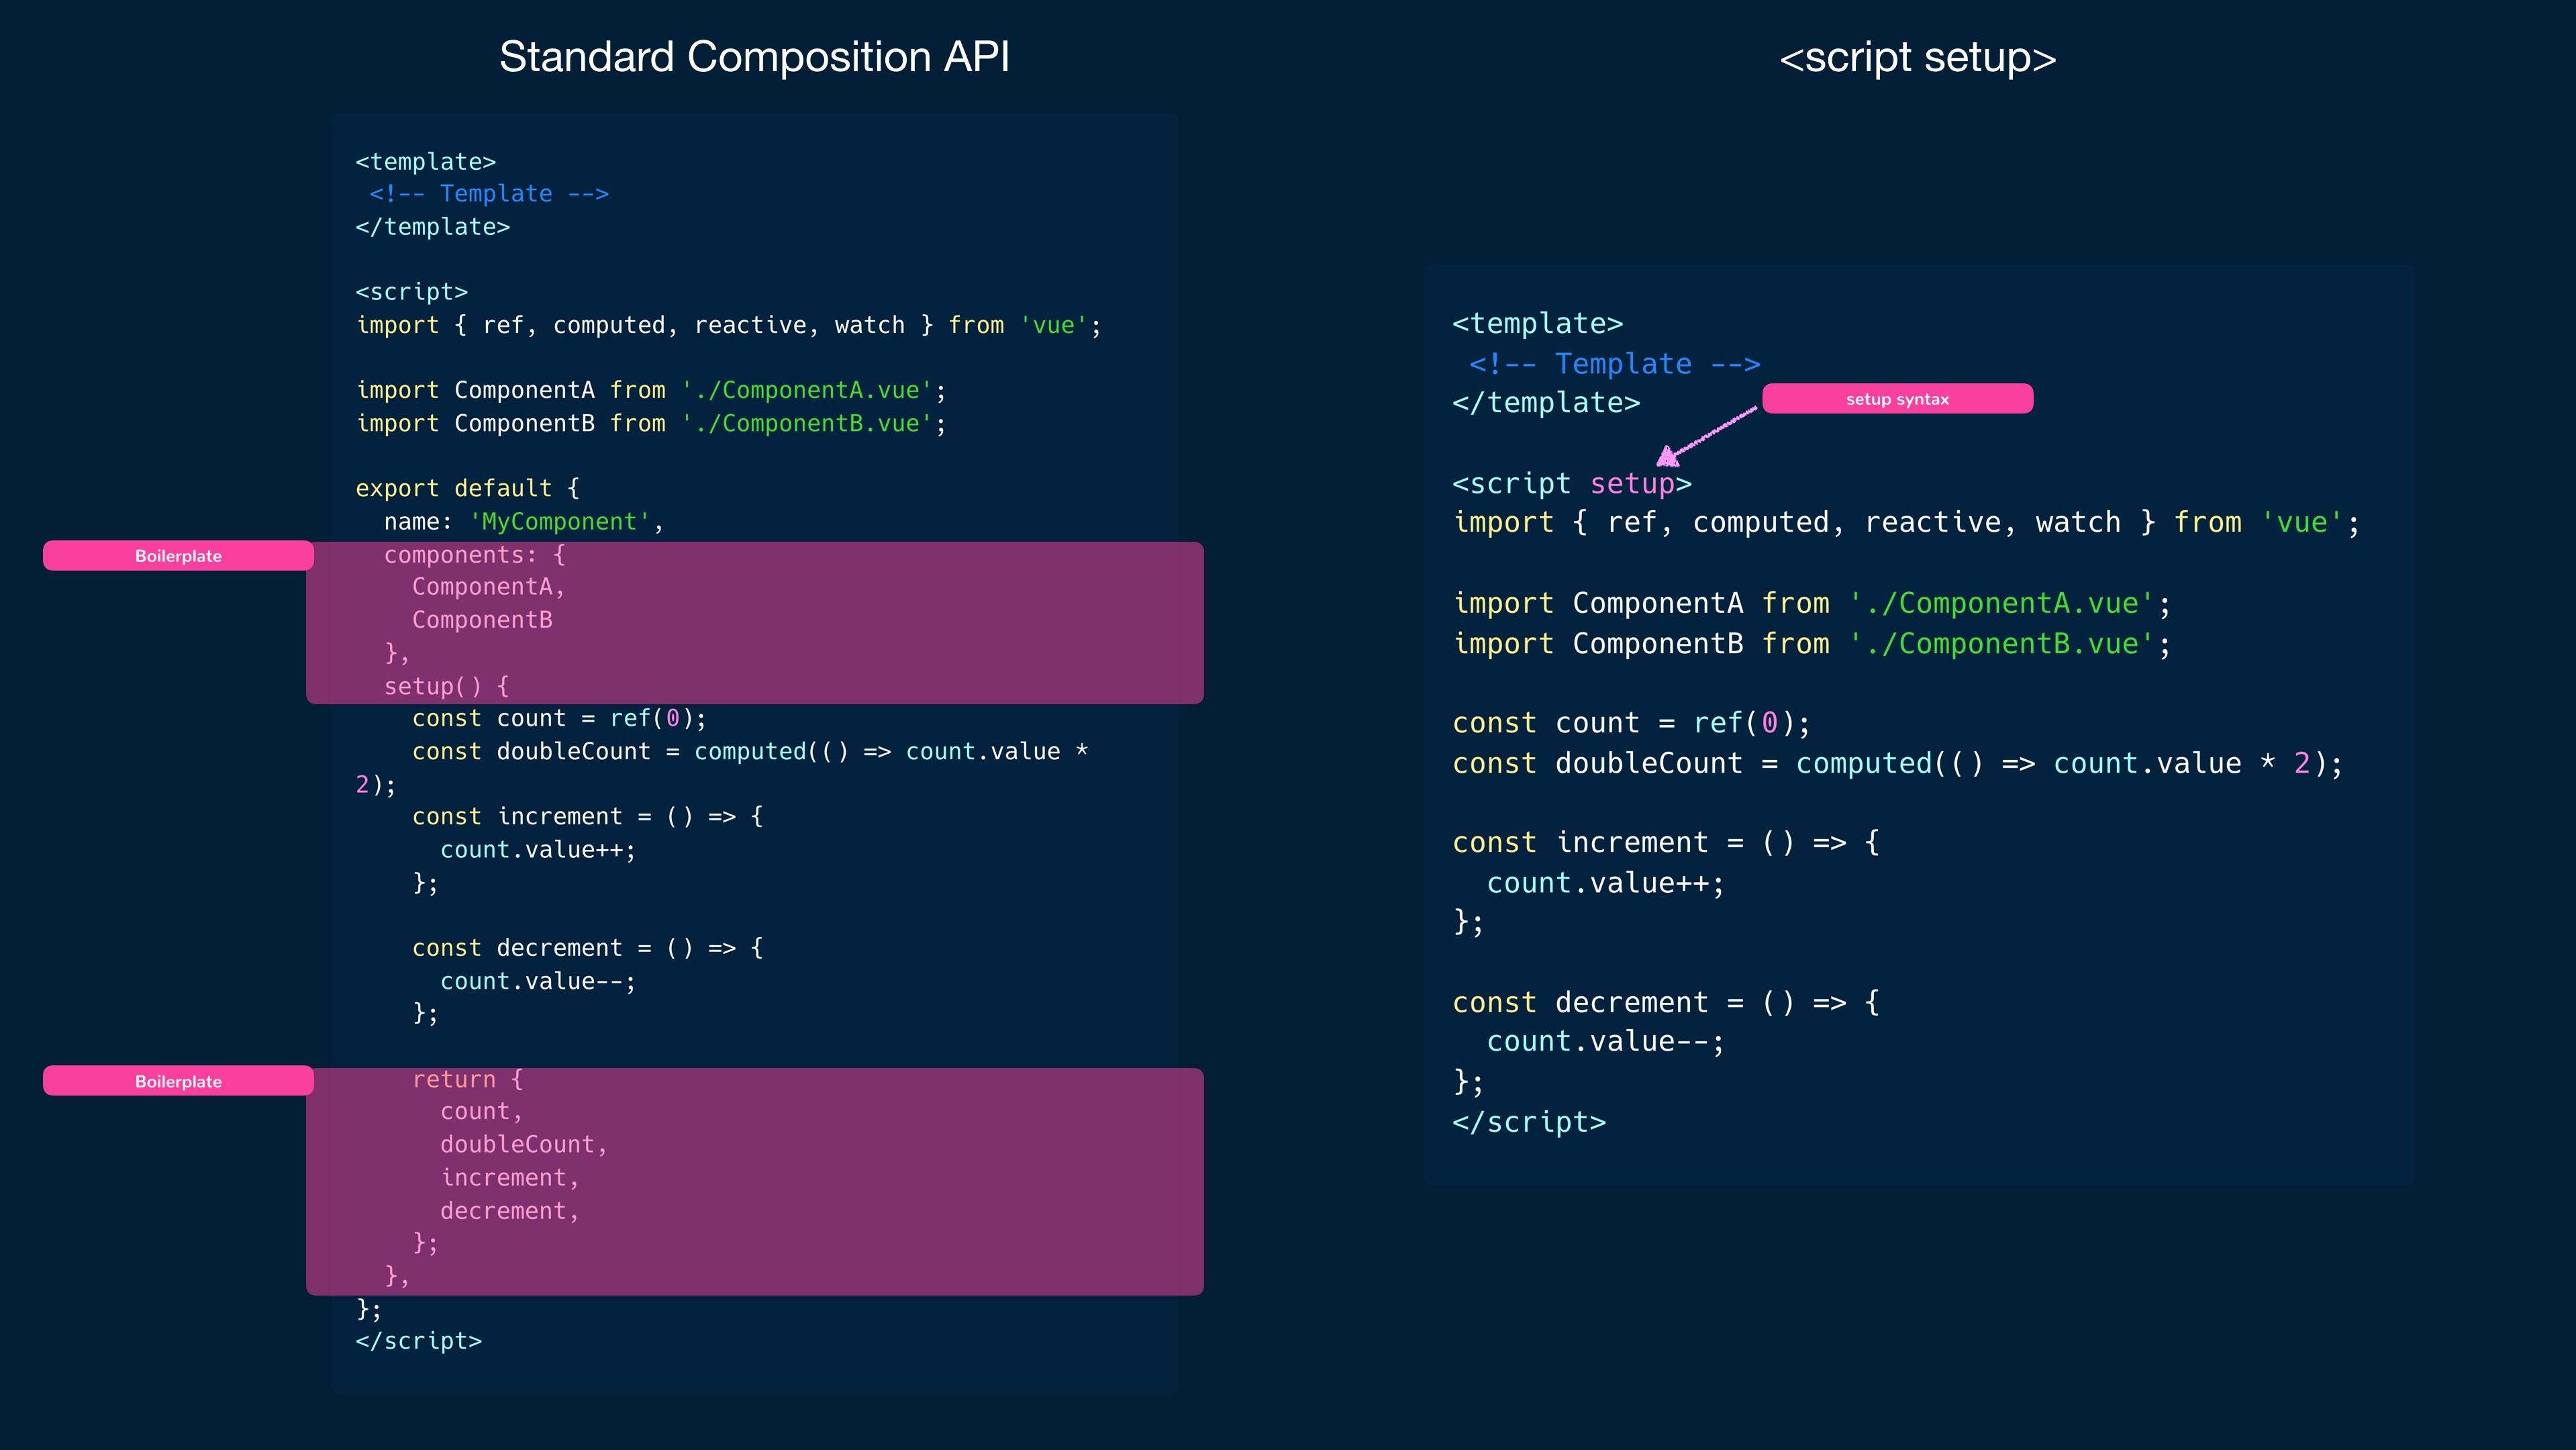
For larger components that have a large number of returned options and many locally registered child components, the <script setup>
syntax helps remove a lot of boilerplate code which leads to cleaner and more focused component definitions that subsequently
helps make the codebase more readable and maintainable.

Outside of reducing boilerplate, the <script setup> syntax also provides better runtime performance, better IDE-type
inference performance, and the ability to declare the shape of props and emitted events with TypeScript.
For a full list of changes that need to be kept in mind when working with the <script setup> syntax, refer to the official
Vue documentation shared below.