Overview of React.js
Over the years, there has been an increased demand for straight-forward ways to compose user-interfaces using JavaScript. React, also referred to as React.js, is an open-source JavaScript library designed by Facebook, used for building user interfaces or UI components.
React is of course not the only UI library out there. Preact, Vue, Angular, Svelte, Lit and many others are also great for composing interfaces from reusable elements. Given React’s popularity, it’s worth walking through how it works given we will be using it to walk through some of the design, rendering and performance patterns in this guide.
When front-end developers talk about code, it’s most often in the context of designing interfaces for the web. And the way we think of interface composition is in elements, like buttons, lists, navigation, and the likes. React provides an optimized and simplified way of expressing interfaces in these elements. It also helps build complex and tricky interfaces by organizing your interface into three key concepts— components, props, and state.
Because React is composition-focused, it can, perfectly map to the elements of your design system. So, in essence, designing for React actually rewards you for thinking in a modular way. It allows you to design individual components before putting together a page or view, so you fully understand each component’s scope and purpose—a process referred to as componentization.
Terminology we will use
- React / React.js / ReactJS - React library, created by Facebook in 2013
- ReactDOM - The package for DOM and server rendering
- JSX - Syntax extension to JavaScript
- Redux - Centralized state container
- Hooks - A new way to use state and other React features without writing a class
- ReactNative - The library to develop cross-platform native apps with Javascript
- Webpack - JavaScript module bundler, popular in React community.
- CRA (Create React App) - A CLI tool to create a scaffolding React app for bootstrapping a project.
- Next.js - A React framework with many best-in-class features including SSR, Code-splitting, optimized for performance, etc.
Rendering with JSX
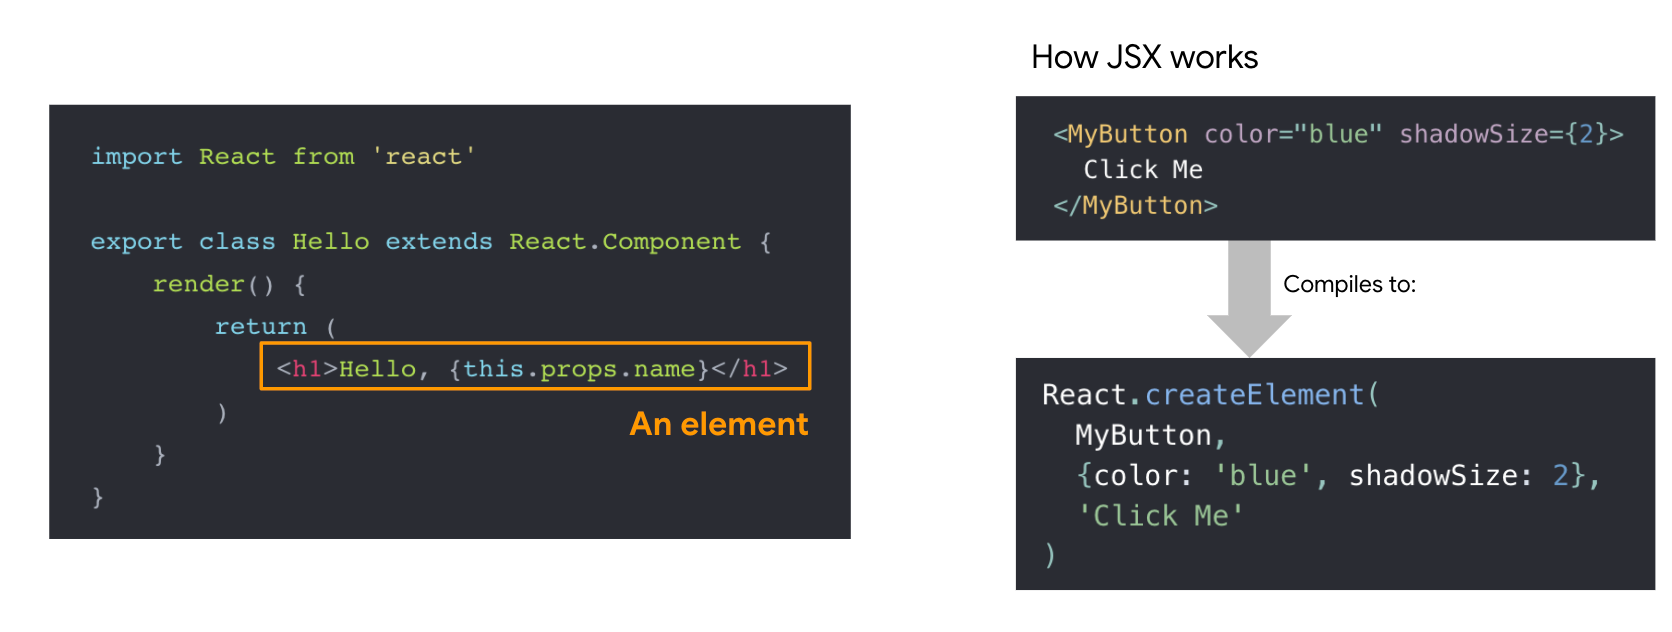
We will be using JSX in a number of our examples. JSX is an extension to JavaScript which embeds template HTML in JS using XML-like syntax. It is meant to be transformed into valid JavaScript, though the semantics of that transformation are implementation-specific. JSX rose to popularity with the React library, but has since seen other implementations as well.
Components, Props, and State
Components, props, and state are the three key concepts in React. Virtually everything you’re going to see or do in React can be classified into at least one of these key concepts, and here’s a quick look at these key concepts:
1. Components

Components are the building blocks of any React app. They are like JavaScript functions that accept arbitrary input (Props) and return React elements describing what should be displayed on the screen.
The first thing to understand is that everything on screen in a React app is part of a component. Essentially, a React app is just components within components within components. So developers don’t build pages in React; they build components.
Components let you split your UI into independent, reusable pieces. If you’re used to designing pages, thinking in this modular way might seem like a big change. But if you use a design system or style guide? Then this might not be as big of a paradigm shift as it seems.
The most direct way to define a component is to write a JavaScript function.
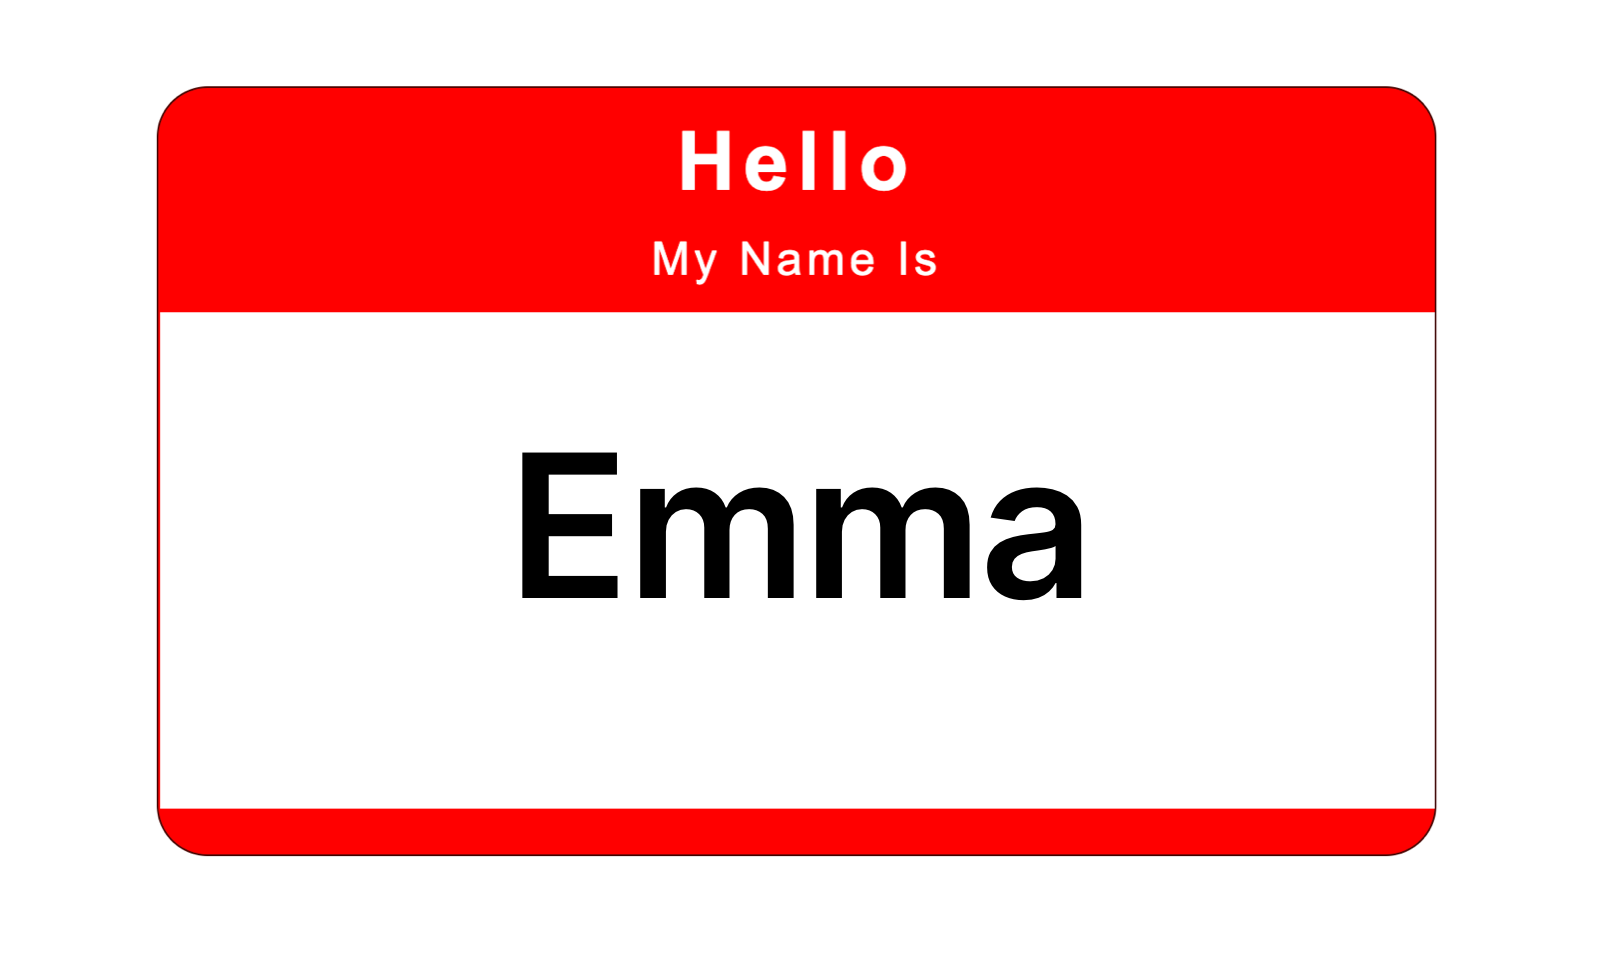
function Badge(props) {
  return <h1>Hello, my name is {props.name}</h1>;
}
This function is a valid React component because it accepts a single prop (which stands for properties) object argument with data and returns a React element. Such components are called ”function components” because they are literally JavaScript functions.
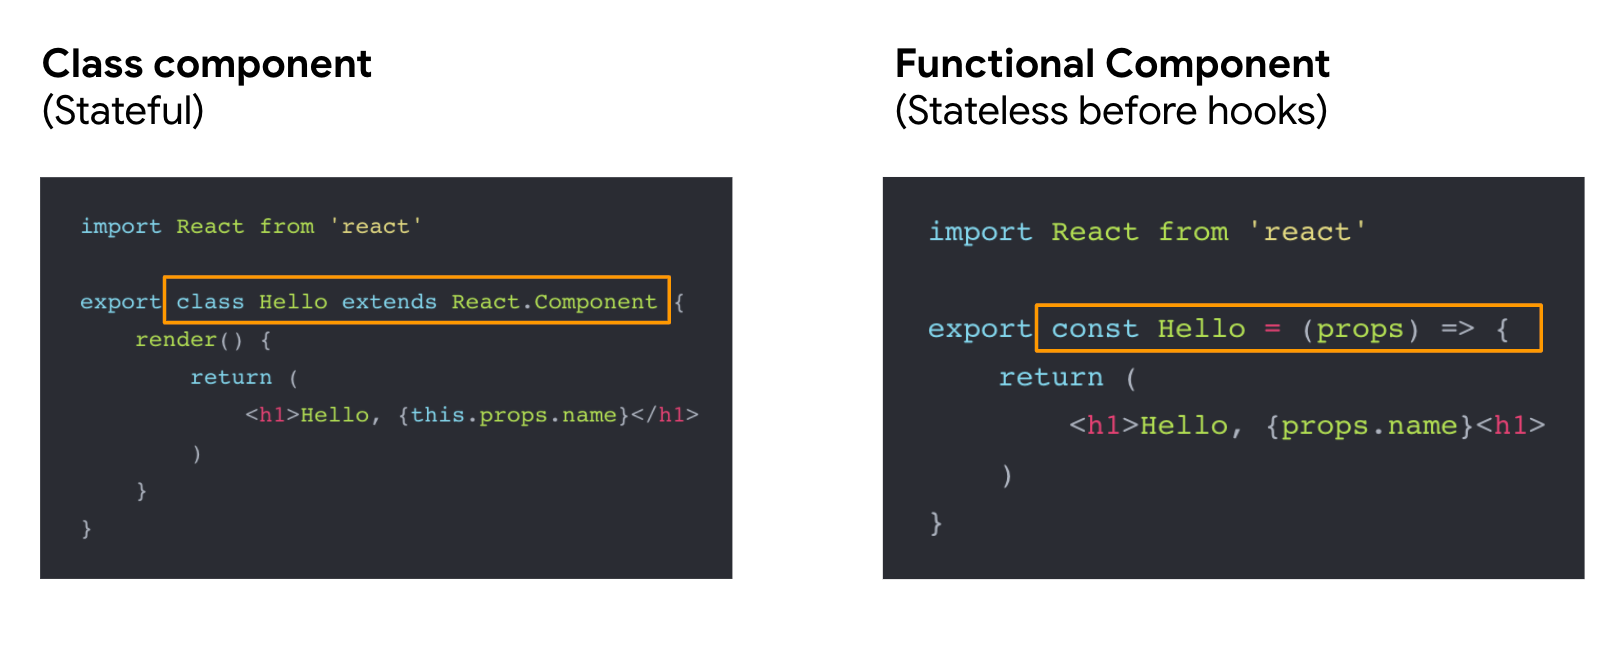
Aside from function components, another type of component are ”class components.” A class component is different from a function component in that it is defined by an ES6 class, as shown below:
class Badge extends React.Component {
  render() {
    return <h1>Hello, my name is {this.props.name}</h1>;
  }
}
Extracting components
To illustrate the facts that components can be split into smaller components, consider the following Tweet component:
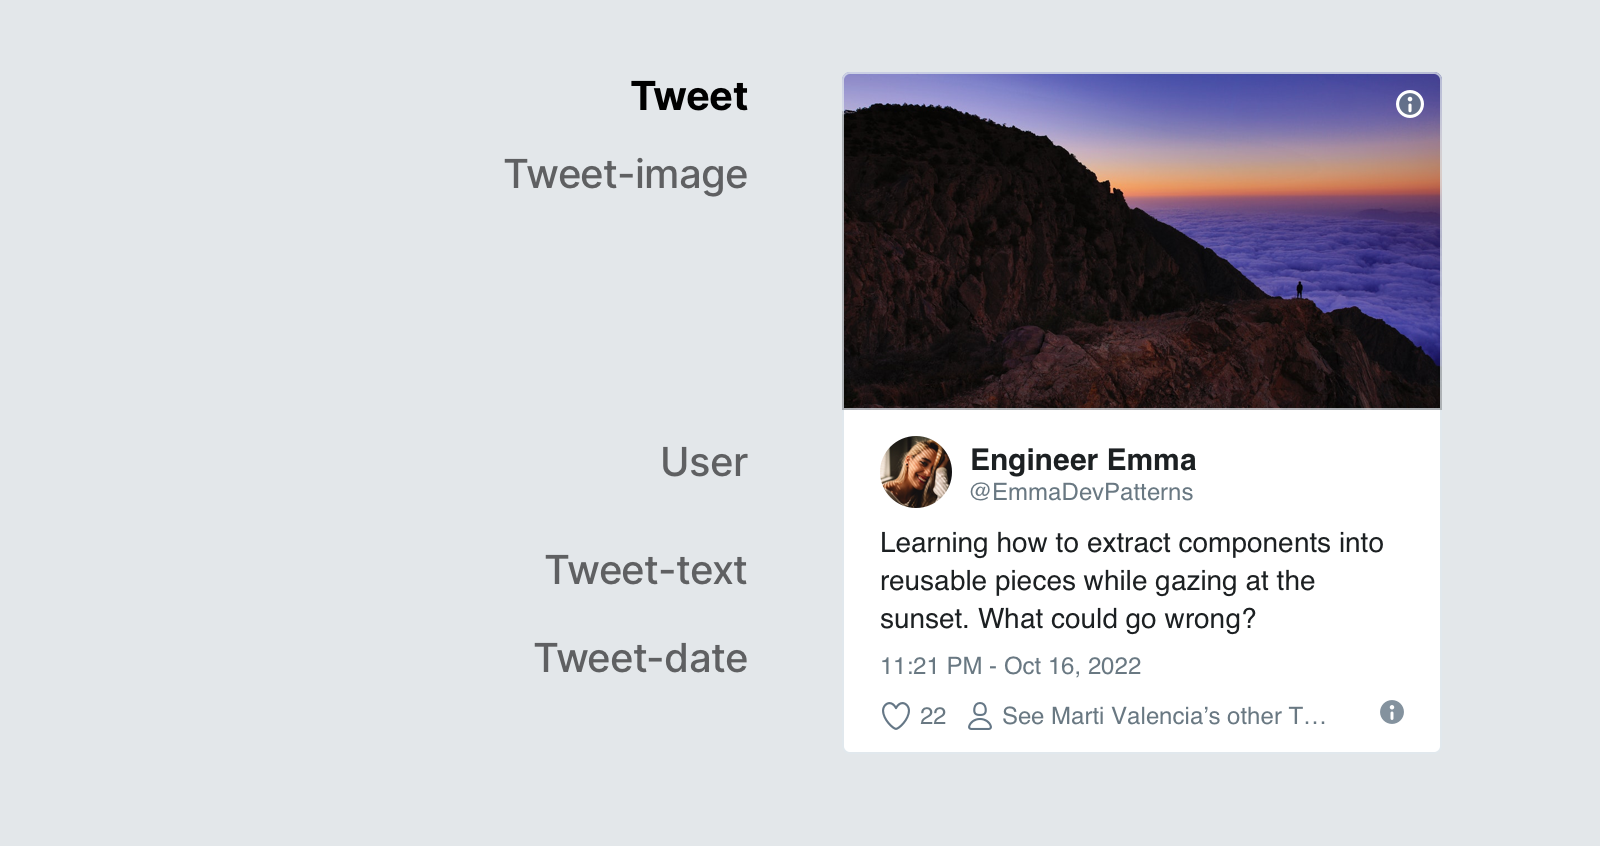
Which can be implemented as follows:
function Tweet(props) {
  return (
    <div className="Tweet">
      <div className="User">
        <Image
          className="Avatar"
          src={props.author.avatarUrl}
          alt={props.author.name}
        />
        <div className="User-name">{props.author.name}</div>
      </div>
      <div className="Tweet-text">{props.text}</div>
      <Image
        className="Tweet-image"
        src={props.image.imageUrl}
        alt={props.image.description}
      />
      <div className="Tweet-date">{formatDate(props.date)}</div>
    </div>
  );
}
This component can be a bit difficult to manipulate because of how clustered it is, and reusing individual parts of it would also prove difficult. But, we can still extract a few components from it.
The first thing we will do is extract* Avatar*:
function Avatar(props) {
  return (
    <Image
      className="Avatar"
      src={props.user.avatarUrl}
      alt={props.user.name}
    />
  );
}
Avatar doesn’t need to know that it is being rendered inside a Comment. This is why we have given its prop a more generic name: user rather than author.
Now we will simplify the comment a little:
function Tweet(props) {
  return (
    <div className="Tweet">
      <div className="User">
        <Avatar user={props.author} />
        <div className="User-name">{props.author.name}</div>
      </div>
      <div className="Tweet-text">{props.text}</div>
      <Image
        className="Tweet-image"
        src={props.image.imageUrl}
        alt={props.image.description}
      />
      <div className="Tweet-date">{formatDate(props.date)}</div>
    </div>
  );
}
The next thing we will do is to a User component that renders an_ Avatar _next to the user’s name:
function User(props) {
  return (
    <div className="User">
      <Avatar user={props.user} />
      <div className="User-name">{props.user.name}</div>
    </div>
  );
}
Now we will simplify Tweet further:
function Tweet(props) {
  return (
    <div className="Tweet">
      <User user={props.author} />
      <div className="Tweet-text">{props.text}</div>
      <Image
        className="Tweet-image"
        src={props.image.imageUrl}
        alt={props.image.description}
      />
      <div className="Tweet-date">{formatDate(props.date)}</div>
    </div>
  );
}
Extracting components seems like a tedious job, but having reusable components makes things easier when coding for larger apps. A good criterion to consider when simplifying components is this: if a part of your UI is used several times (Button, Panel, Avatar), or is complex enough on its own (App, FeedStory, Comment), it is a good candidate to be extracted to a separate component.
2. Props
Props are a short form for properties, and they simply refer to the internal data of a component in React. They are written inside component calls and are passed into components. They also use the same syntax as HTML attributes, e.g._ prop=“value”. Two things that are worth remembering about props; Firstly, we determine the value of a prop and use it as part of the blueprint before the component is built. Secondly, the value of a prop will never change, i.e. props are read-only once they are passed into components.
The way you access a prop is by referencing it via the “this.props” property that every component has access to.
3. State
State is an object that holds some information that may change over the lifetime of the component. Meaning it is just the current snapshot of data stored in a component’s Props. The data can change over time, so techniques to manage the way that data changes become necessary to ensure the component looks the way engineers want it to, at just the right time — this is called State management.

It’s almost impossible to read one paragraph about React without coming across the idea of state-management. Developers love expounding upon this topic, but at its core, state management isn’t really as complex as it sounds.
In React, state can also be tracked globally, and data can be shared between components as needed. Essentially, this means that in React apps, loading data in new places is not as expensive as it is with other technologies. React apps are smarter about which data they save and load, and when. This opens up opportunities to make interfaces that use data in new ways.
Think of React components like micro-applications with their own data, logic, and presentation. Each component should have a single purpose. As an engineer, you get to decide that purpose and have complete control over how each component behaves and what data is used. You’re no longer limited by the data on the rest of the page. In your design, you can take advantage of this in all kinds of ways. There are opportunities to present additional data that can improve the user experience or make areas within the design more contextual.
How to add State in React
When designing, Including state is a task that you should save for last. It is much better to design everything as stateless as possible, using props and events. This makes components easier to maintain, test, and understand. Adding states should be done through either state containers such as Redux and MobX, or a container/wrapper component. Redux is a popular state management system for other reactive frameworks. It implements a centralized state machine driven by actions.

In the example below, the place for the state could be LoginContainer itself. Let’s use React Hooks (this will be discussed in the next section) for this:
const LoginContainer = () => {
  const [username, setUsername] = useState("");
  const [password, setPassword] = useState("");

  const login = async (event) => {
    event.preventDefault();
    const response = await fetch("/api", {
      method: "POST",
      body: JSON.stringify({
        username,
        password,
      }),
    });
    // Here we could check response.status to login or show error
  };

  return (
    <LoginForm onSubmit={login}>
      <FormInput
        name="username"
        title="Username"
        onChange={(event) => setUsername(event.currentTarget.value)}
        value={username}
      />
      <FormPasswordInput
        name="password"
        title="Password"
        onChange={(event) => setPassword(event.currentTarget.value)}
        value={password}
      />
      <SubmitButton>Login</SubmitButton>
    </LoginForm>
  );
};
For further examples such as the above, see Thinking in React 2020.
Props vs State
Props and state can sometimes be confused with each other because of how similar they are. Here are some key differences between them:
| Props | State |
|---|---|
| The data remains unchanged from component to component. | Data is the current snapshot of data stored in a component’s Props. It changes over the lifecycle of the component. |
| The data is read-only | The data can be asynchronous |
| The data in props cannot be modified | The data in state can be modified using this.setState |
| Props are what is passed on to the component | State is managed within the component |
Other Concepts in React
Components, props, and state are the three key concepts for everything you’ll be doing in react. But there are also other concepts to learn about:
1. Lifecycle
Every react component goes through three stages; mounting, rendering, and dismounting. The series of events that occur during these three stages can be referred to as the component’s lifecycle. While these events are partially related to the component’s state (its internal data), the lifecycle is a bit different. React has internal code that loads and unloads components as needed, and a component can exist in several stages of use within that internal code.
There are a lot of lifecycle methods, but the most common ones are:
render() - This method is the only required method within a class component in React and is the most used. As the name suggests, it handles the rendering of your component to the UI, and it happens during the mounting and rendering of your component.
When the component is created or removed:
componentDidMount()runs after the component output has been rendered to the DOM.componentWillUnmount()is invoked immediately before a component is unmounted and destroyed
When the props or states get updated:
shouldComponentUpdate()is invoked before rendering when new props or state are being received.componentDidUpdate()is invoked immediately after updating occurs. This method is not called for the initial render.
2. Higher-order component(HOC)
Higher-order components (HOC) are an advanced technique in React for reusing component logic. Meaning a higher-order component is a function that takes a component and returns a new component. They are patterns that emerge from React’s compositional nature. While a component transforms props into UI, a higher-order component transforms a component into another component, and they tend to be popular in third-party libraries.
3. Context
In a typical React app, data is passed down via props, but this can be cumbersome for some types of props that are required by many components within an application. Context provides a way to share these types of data between components without having to explicitly pass a prop through every level of hierarchy. Meaning with context, we can avoid passing props through intermediate elements.
React Hooks
Hooks are functions that let you “hook into” React state and lifecycle features from functional components. They let you use state and other React features without writing a class. You can learn more about Hooks in our Hooks guide.
Thinking in React
One thing that is really amazing about React is how it makes you think about apps as you build them. In this section, we’ll walk you through the thought process of building a Searchable product data table using React Hooks.
Step 1: Start with a Mock Imagine that we already have a JSON API and a mock of our interface:

Our JSON API returns some data that looks like this:
[
  {
    category: "Entertainment",
    retweets: "54",
    isLocal: false,
    text: "Omg. A tweet.",
  },
  {
    category: "Entertainment",
    retweets: "100",
    isLocal: false,
    text: "Omg. Another.",
  },
  {
    category: "Technology",
    retweets: "32",
    isLocal: false,
    text: "New ECMAScript features!",
  },
  {
    category: "Technology",
    retweets: "88",
    isLocal: true,
    text: "Wow, learning React!",
  },
];
Tip: You may find free tools like Excalidraw useful for drawing out a high-level mock of your UI and components.
Step 2: Break the UI into a Hierarchy Component
When you have your mock, the next thing to do is to draw boxes around every component (and subcomponent) in the mock and name all of them, as shown below.
Use the single responsibility principle: a component should ideally have a single function. If it ends up growing, it should be broken down into smaller subcomponents. Use this same technique for deciding if you should create a new function or object.

You’ll see in the image above that we have five components in our app. We’ve listed the data each component represents.
- TweetSearchResults (orange): container for the full component
- SearchBar (blue): user input for what to search for
- TweetList (green): displays and filters tweets based on user input
- TweetCategory (turquoise): displays a heading for each category
- TweetRow (red): displays a row for each tweet
Now that the components in the mock have been identified, the next thing to do would be to sort them into a hierarchy. Components that are found within another component in the mock should appear as a child in the hierarchy. Like this:
- TweetSearchResults
- SearchBar
- TweetList
- TweetCategory
- TweetRow
Step 3: Implement the components in React The next step after completing the component hierarchy is to implement your app. Before last year, the quickest way was to build a version that takes your data model and renders the UI but has zero interactivity, but since the introduction of React Hooks, an easier way to implement your app is to use the Hooks as seen below:
i. Filterable list of tweets
const TweetSearchResults = ({ tweets }) => {
  const [filterText, setFilterText] = useState("");
  const [inThisLocation, setInThisLocation] = useState(false);
  return (
    <div>
      <SearchBar
        filterText={filterText}
        inThisLocation={inThisLocation}
        setFilterText={setFilterText}
        setInThisLocation={setInThisLocation}
      />
      <TweetList
        tweets={tweets}
        filterText={filterText}
        inThisLocation={inThisLocation}
      />
    </div>
  );
};
ii. SearchBar
const SearchBar = ({
  filterText,
  inThisLocation,
  setFilterText,
  setInThisLocation,
}) => (
  <form>
    <input
      type="text"
      placeholder="Search..."
      value={filterText}
      onChange={(e) => setFilterText(e.target.value)}
    />
    <p>
      <label>
        <input
          type="checkbox"
          checked={inThisLocation}
          onChange={(e) => setInThisLocation(e.target.checked)}
        />{" "}
        Only show tweets in your current location
      </label>
    </p>
  </form>
);
iii. Tweet list (list of tweets)
const TweetList = ({ tweets, filterText, inThisLocation }) => {
  const rows = [];
  let lastCategory = null;

  tweets.forEach((tweet) => {
    if (tweet.text.toLowerCase().indexOf(filterText.toLowerCase()) === -1) {
      return;
    }
    if (inThisLocation && !tweet.isLocal) {
      return;
    }
    if (tweet.category !== lastCategory) {
      rows.push(
        <TweetCategory category={tweet.category} key={tweet.category} />
      );
    }
    rows.push(<TweetRow tweet={tweet} key={tweet.text} />);
    lastCategory = tweet.category;
  });

  return (
    <table>
      <thead>
        <tr>
          <th>Tweet Text</th>
          <th>Retweets</th>
        </tr>
      </thead>
      <tbody>{rows}</tbody>
    </table>
  );
};
iv. Tweet category row
const TweetCategory = ({ category }) => (
  <tr>
    <th colSpan="2">{category}</th>
  </tr>
);
v. Tweet Row
const TweetRow = ({ tweet }) => {
  const color = tweet.isLocal ? "inherit" : "red";

  return (
    <tr>
      <td>
        <span style="">{tweet.text}</span>
      </td>
      <td>{tweet.retweets}</td>
    </tr>
  );
};
The final implementation would be all the code written together in the previously stated hierarchy :
- TweetSearchResults
- SearchBar
- TweetList
- TweetCategory
- TweetRow
Getting Started
There are various ways to start using React.
Load directly on the web page: This is the simplest way to set up React. Add the React JavaScript to your page, either as an npm dependency or via a CDN.
Use create-react-app: create-react-app is a project aimed at getting you to use React as soon as possible, and any React app that needs to outgrow a single page will find that create-react-app meets that need quite easily. More serious production applications should consider using Next.js as it has stronger defaults (like code-splitting) baked in.
Code Sandbox: An easy way to have the create-react-app structure, without installing it, is to go to https://codesandbox.io/s and choose “React.”
Codepen: If you are prototyping a React component and enjoy using Codepen, a number of React starting points are also available for use.
Conclusion
The React.js library was designed to make the process of building modular, reusable user interface components simple and intuitive. As you read through some of our other guides, we hope you found this brief introduction a helpful high-level overview.
If you’re interested in further reading on the React fundamentals, see:
This guide would not have been possible without the teaching styles shared in the official React components and props, thinking in React, thinking in React Hooks and the scriptverse docs